Hyperlinks allow website visitors to navigate to other parts of a website or to an external URL from a page, page section, article, some content elements and parts thereof. You can turn rich text into a link quickly and easily in the Editor.
In This Topic
Selecting the Link Text in the Editor
To select the text you want to turn into a hyperlink, follow these steps:
- Navigate to the content item containing the text you want to turn into a link.
- Double-click the content area or hover the mouse over the page title and select [Edit]. The Editor becomes active.
- In the Editor, highlight the text that you want to turn into a link.
- Select [Link] from the Editor's menu bar:
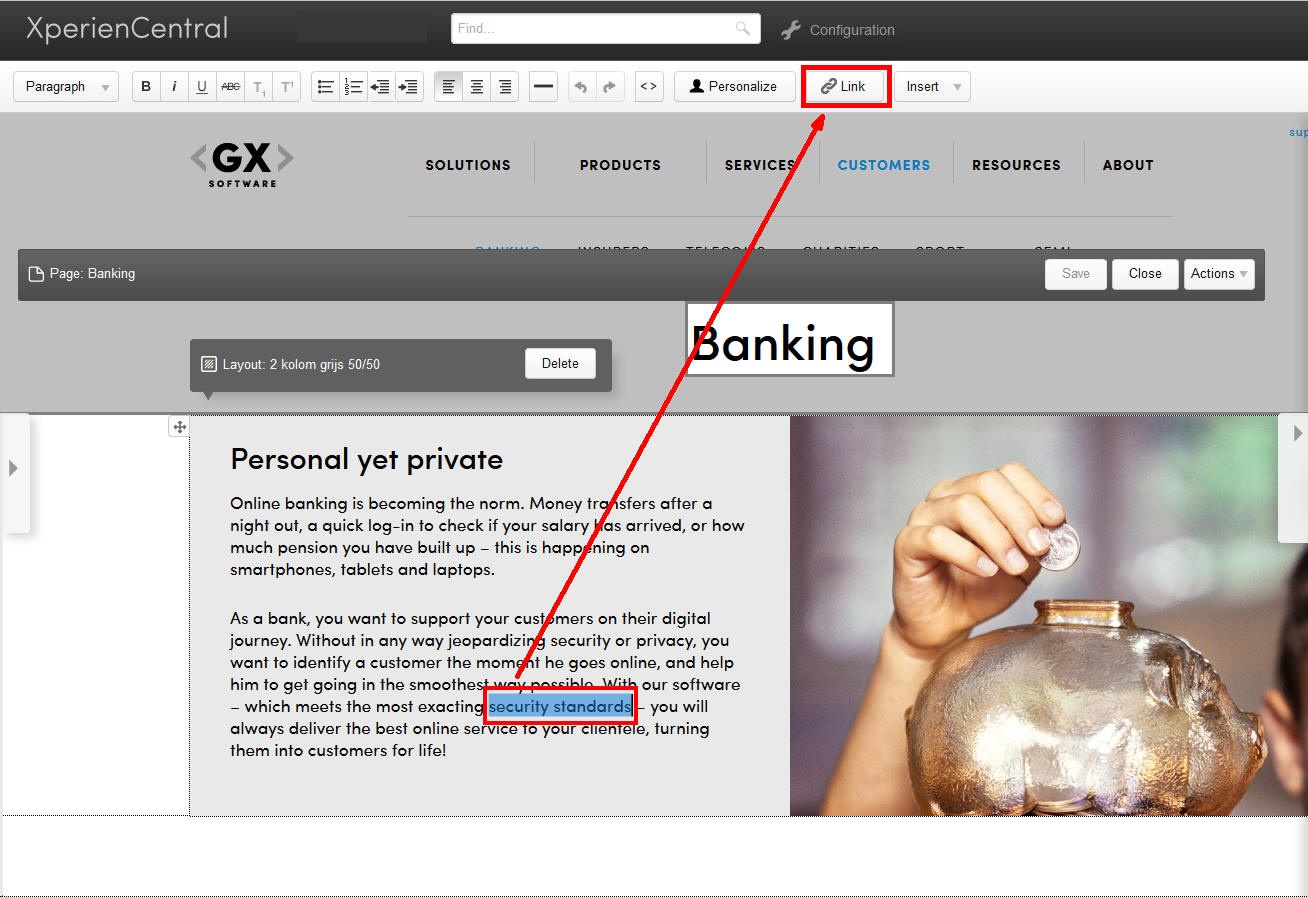
The Create Link dialog box appears: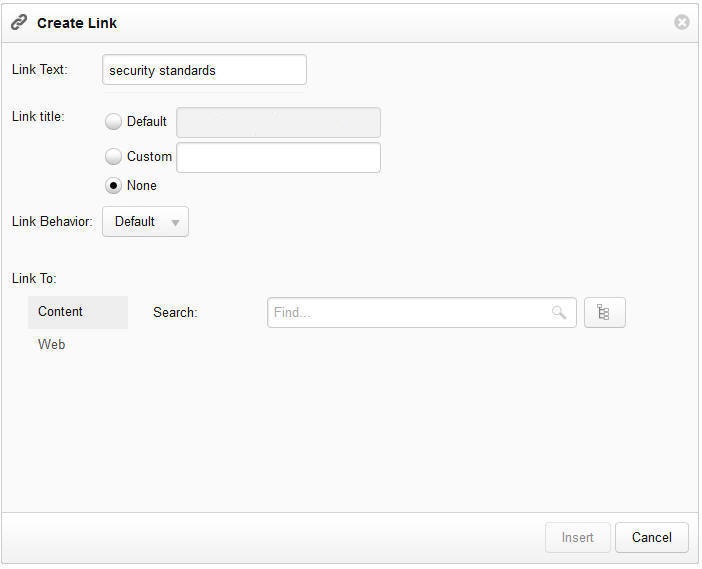
Hyperlinks can be either to a content item in an XperienCentral channel or to an external URL.
Link Text
In the "Link Text" field, enter the text that displays for the link in the content item. By default the selected text appears in this field. If you change the text in the "Link Text" field, the text in the Rich Text Editor (content item) will also change.
Link Title
The link title functionality was introduced in XperienCentral version 10.26.1.
The link title defines the text that appears in a tool tip that displays when a website visitor hovers the mouse cursor over the link on the website frontend. By default this is the title of the content item or the URL of the web link. You can also define custom text to display in the tool tip or prevent a tool tip from appearing at all.
The options for the link title are:
| Title | Description |
|---|---|
| Default | The title of the content item or the URL that is entered in the "Address" field for the web link is used for the link title. |
Custom | User-defined text that appears in the tool tip instead of the title of the content item or the URL of the web link. Custom text is useful for when you want to provide more information to the website visitor about the nature of the content that is available should they follow the link. |
| None | When you select this option, no tool tip displays when the link is hovered over. |
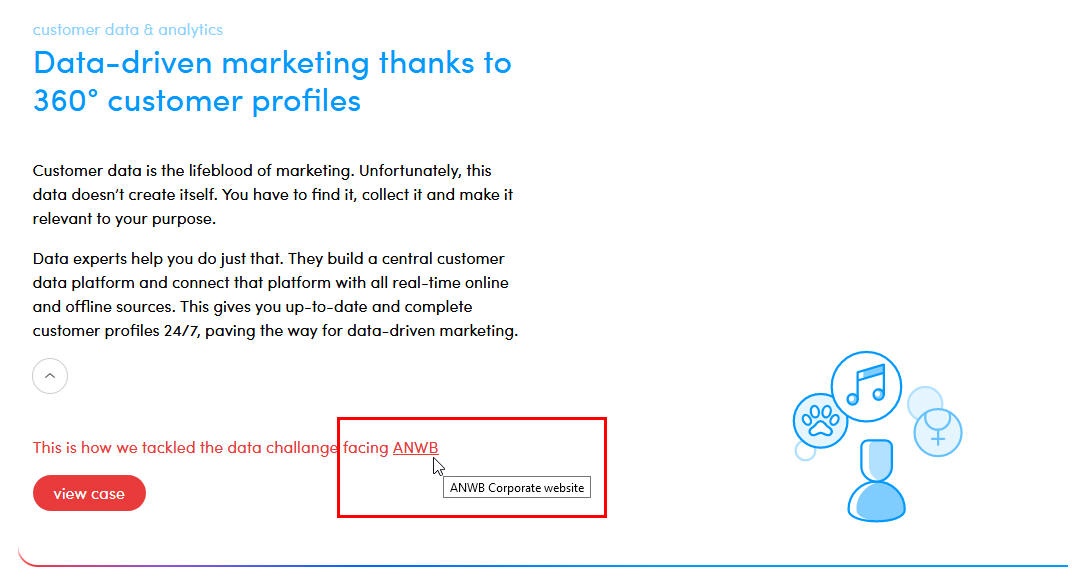
The image below shows an example of custom link text that makes it clear that by following the link the visitor will go to the ANWB corporate website:
Link Behavior
Select the link behavior from the "Link Behavior" drop-down list. If you don't know which link behavior to use, contact your main editor or application manager for information about the link behaviors available in your deployment and under which circumstances each should be used.
Content Link
Content links link to a content item in an XperienCentral channel. Follow these steps to create a content link.
Select Content Using Search
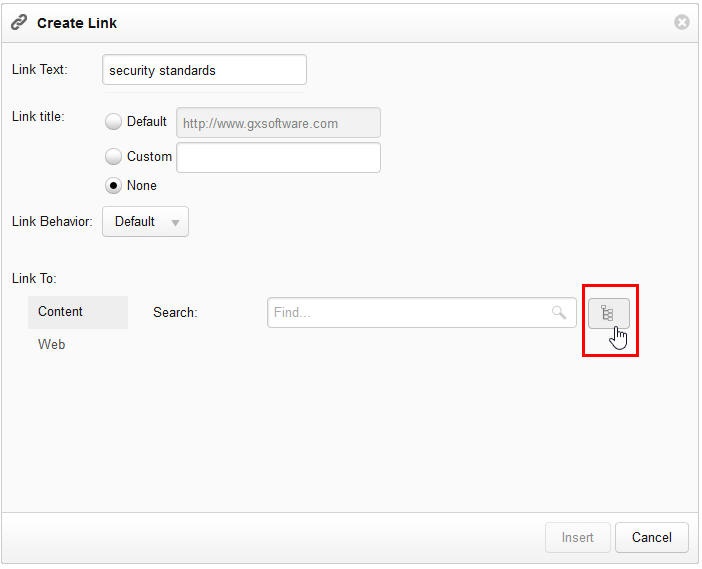
- In the "Content" field, type a full or partial string to search for the content item to which you want to link.
- Select the content item from the list of items found. If the content item you are searching for was not found, click Advanced Search to conduct a more thorough search based on content item metadata.
- Click [Apply]. The text in the content item changes color and is underlined (according to your corporate style).
- Continue editing the content or click [Save] to save the change(s).
Select a Page Using the Page Tree
If you are linking to a page, follow these steps:
- Click the page tree icon:
- Navigate through the page tree and click the page you want to link to.
- Click [Select].
- Click [Apply]. The text in the content item changes color and is underlined (according to your corporate style).
- Continue editing the content or click [Save] to save the change(s).
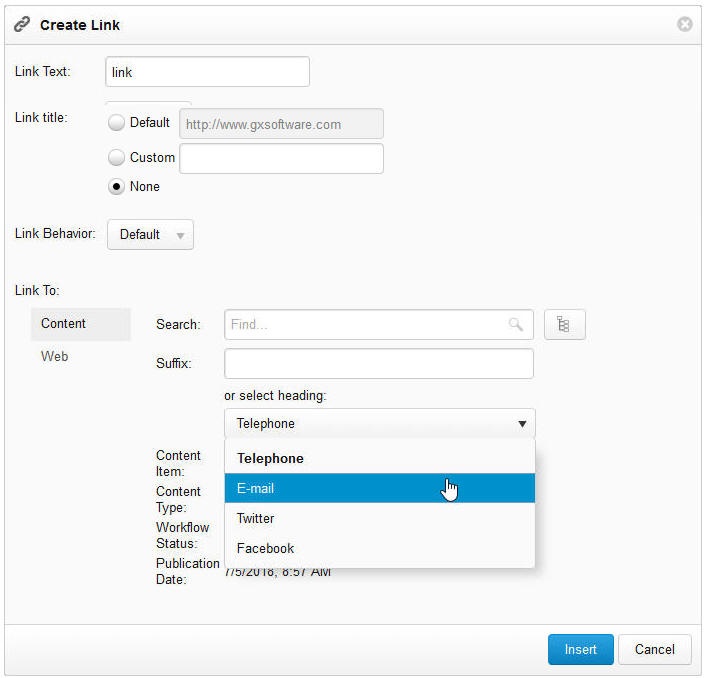
Link to a Heading within a Content Item
The linking to a heading in a content item functionality was introduced in XperienCentral version 10.20.0.
To link directly to a heading (h1-h6) in a content item, select it from the drop-down list. For example: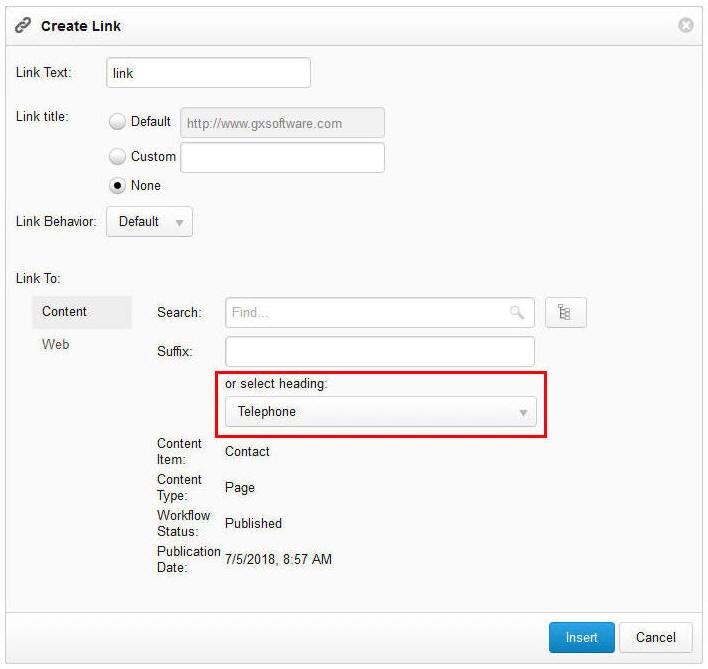
Web Link
A web link is a link to a URL external to your XperienCentral channel. To add a web link, follow these steps:
- Enter the suffix URL for the external link in the "Address" field (leaving off the prefix "http://").
- Click [Apply].
The text in the content item changes color and is underlined (according to your corporate style), or if the link is a supported embed type, the embedded content appears. Continue editing the content or click [Save] to save the change(s).
Embedding Content
Web link content can be embedded in a content item which means that the website visitor sees a compact version of the content within XperienCentral. When you embed content, keep in mind that there is a minimum width required in order to display the embedded content, therefore it might not be possible to embed content in some content items if there is not enough room. XperienCentral tries to make the embedded content fit automatically based on the size of the area in which the content is embedded.
At this time, XperienCentral supports content embedding for the following social media:
- YouTube - full URLs are supported but the "youtu.be" domain, also referred to as a "short link", is not.
- Vimeo
- Dailymotion
- Hulu
- Vine
- Flickr
- SlideShare
- Spotify
- SoundCloud
- Ted (talks)
- Scribd
If you don't see a preview of embedded external content, it could be the case that your web server's content security policies are set to a strict level. Contact your application manager for more information.
For supported link types, select whether to embed the content directly in the content item. Embedding is supported for the content types listed above. When content is embedded, a website visitor can interact with it directly in the content item. The following shows an embedded YouTube video on a web page: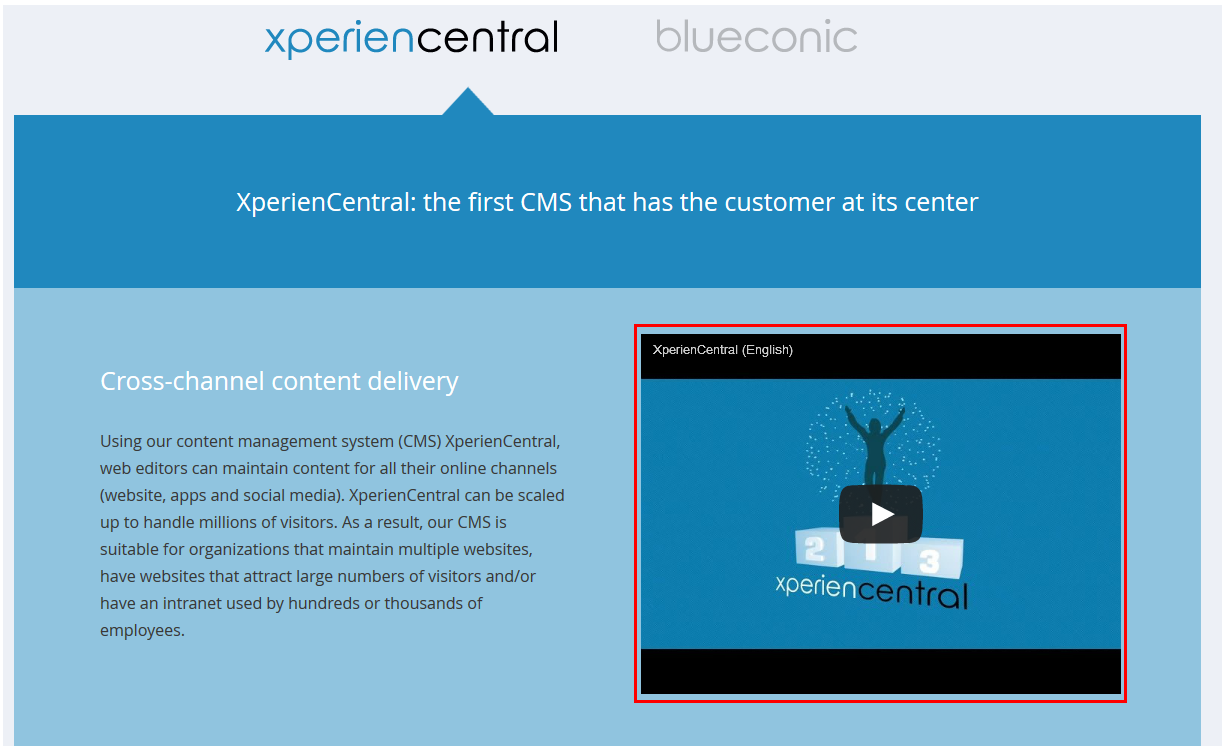
For security reasons, XperienCentral makes it possible to restrict the link scheme types that are allowed, for example only those beginning with "http" and "https".. If an error message is returned while you are trying to create a web link, contact your application manager.
Linking to an Anchor
You can link directly to an anchor from other content items. This is useful if you want a visitor to be able to link directly to a heading within another content item instead of landing at the top of the linked content item. See Headings as Anchors for complete information.
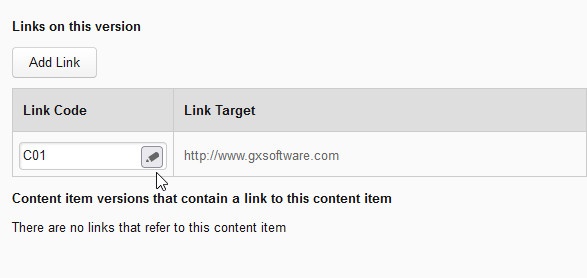
Link Codes
Each hyperlink created in a content item is automatically assigned an internal link code. The mapping between the target content item/URL and the link code assigned to it applies to the current content item only. The naming pattern of link codes is "C0x" where "x" begins at 1 and increases by 1 (C01, C02, C03, and so forth) for each new link added to the current content item. The naming pattern is the same for all content items which means that the first link created in Content Item A, for example, is assigned the link code "C01" and the first link created in Content Item B is also "C01". You are not tied to the default naming convention and can rename them in the Links tab of the Properties panel. The reason for a link code is that it can be assigned to the content elements Image, List and Table which makes the entire content element itself a link. In XperienCentral versions R37 and higher, link codes can also be used in the Content Overview and Dynamic Content Overview content elements. You can see the available link codes/target URLs on the Links tab of the Properties panel.
Adding a Link Code Manually
XperienCentral automatically assigns a link code to each link you add to a content item. However, it is also possible to manually add a link code and target URL manually. This is for cases when you want to assign a link code to a content element but the link does not exist anywhere else in the content item. To manually add a link code, follow these steps:
- Navigate to the Links tab of the Properties panel.
- Click [Add Link].
- Select the link behavior from the "Link Behavior" drop-down.
- Select the target for the link: other content on this website ("Content") or an external URL ("Web").
- If the link is of type "Content", enter a full or partial string in the "Search" field and then select the target content. To select a page from the page tree, click the page tree icon.
- If the link is of type "Web", enter the full target URL in the "Suffix" field.
- Click [Save]. The new link code is added.
Renaming a Link Code
To rename a link code, follow these steps:
- Hover the mouse to the right of the name of the link code:
- Click the pencil icon.
- Rename the link code using a string of your choice (no spaces).
- Click the checkmark icon.
- Click [Save].
Adding a Link Code to a Content Element
To make a link out of an Image, Table or List element, follow these steps:
- Expand the "Link Code" drop-down in an Image, Table or List content element.
- Select the link code from the list. For example:
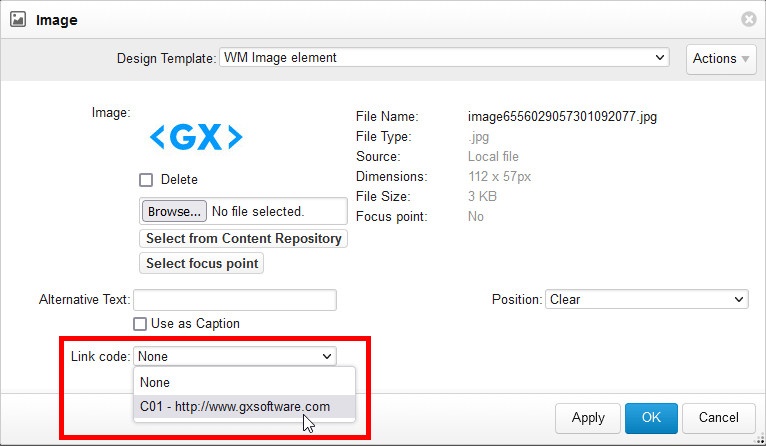
- Click [Apply]. The link code is assigned and the entire content element now acts as a link on the front-end.
The following is an example of an image link:

Using Link Codes in the Content Overview and Dynamic Content Overview Elements
See Content Overview and Dynamic Content Overview for complete information.
Making a Link from Content Element Components
It is possible to make specific parts of some content elements into hyperlinks. See Content Element Actions Menu for complete information.