A step can contain pre-handlers and handlers that can perform a variety of actions either before a step is rendered or after the website visitor navigates to the following step in the form. Handlers and pre-handlers consist of commands, routers, or script that can perform a wide variety of tasks.
To view a step's properties, click the button to toggle between step and form element properties above the properties pane.
In This Topic
Handlers and Prehandlers
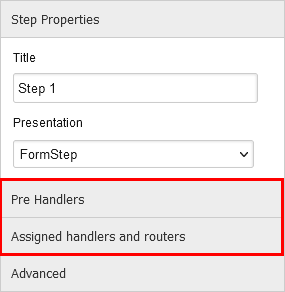
Interactive Forms contains handlers for manipulating data in a session and form scope, copying files, sending e-mail, and executing JavaScript. The actions assigned to a pre-handler are executed before a step is rendered in the website frontend. The actions assigned to a handler are executed after a step is submitted by the website visitor. The actions that you can assign to handlers and pre-handlers are identical. In addition to handlers and routers, a step can have validators assigned to it in a handler (but not in a pre-handler). To add actions to a handler or pre-handler, click [Handlers and Routers] or [Pre Handlers]:
The Handlers and Routers pane appears. The available handlers that you can add are in the "Handlers" list. The available routers are in the "Routers" list, the "Condition" tool is shown by C, and the canvas where the handlers, router, and conditions are placed. To place a handler, router, or condition on the canvas, simply click it in the list.To expand the handler, router, or condition, click the plus sign (+) at the far right. To expand all handlers, router, and/or conditions that are on the canvas, click the expand all button.
The three types of objects that appear on the canvas are represented by the following symbols:
| Symbol | Description |
|---|---|
| Handler |
| Router |
| Validator |
| Condition |


How to use each of the handlers and routers and the condition is described in the following sections.
To add handlers, routers, validators and conditions, click the name of the form step in Interactive Forms and then expand the relevant accordion section:
Add Value to Session
The Add value to session handler adds a value from the form scope to an XperienCentral session. This makes it possible to use personalization based on information taken from a form. A form scope runs within a XperienCentral session which contains personalized information about a website visitor based on their profile. A form scope also contains information that is specific to the visitor. Using the "Add value to session" handler, data from the form scope can be written to the XperienCentral session where personalization can then be used to manipulate the data.
To add a value from the form scope to an XperienCentral session, follow these steps:
- Select "Add value to session" from the list of Handlers.
Enter the following information in fields:
Field Description sessionkeyThe key of the XperienCentral session to which you want to write the value taken from the form scope. valueThe value that you want to write to the specified session. In this field you can enter JavaScript.
- Click [Apply].
For example, the following XML adds the value from the form element "wm_fragment_3" from step 1 of the form to the session:<fragment3>$wmstep_1.wmfragment_3.value$</fragment3>
Copy File
The Copy File handler copies a file that has been uploaded by a website visitor to a new location. To copy a file that has been uploaded by a website visitor to a new location, follow these steps:
- Select "Copy File" from the list of handlers.
Enter the following information in fields:
Field Description Uploaded file Select the Upload form element which was used to upload the file from the drop-down list. Target directory The full drive and directory path where you want to copy the file. Target filename Enter a new name for the file if you want to rename it. Create target directory Select this option to create the specified target directory if it does not already exist. Overwrite existing file Select this option if you want to overwrite the file if it exists.
- Click [Apply].
Execute JavaScript
The Execute JavaScript handler executes the JavaScript code that you enter. To execute JavaScript, follow these steps:
- Select "Execute JavaScript" from the list of handlers.
- Enter the JavaScript to execute in the "Script" box.
For complete information on using JavaScript in Interactive Forms, see the section Scripting in Forms.
Send E-mail
The Send E-mail handler sends an e-mail to the specified recipient. In the body of the e-mail you can enter JavaScript in order to send information from the formscope or session as part of the message. To send an e-mail, follow these steps:
- Click "Send Email" in the list of handlers.
Enter the following information in the fields. The information can be selected from a field in the form (the default option), typed in as free text, or typed in as a free expression. To switch between the modes, click the down arrow next to the field and select the option from the drop-down list.
Field Description From Address The e-mail address that appears in the "From" field of the e-mail message. From Name The name of the person or entity that sends the message. To Address The e-mail address to which the message is sent. To Name The name of the person to which the message is sent. CC Address The e-mail address of the CC recipient. CC Name The name of the CC recipient. BCC Address The e-mail address of the BCC recipient. BCC Name The name of the BCC recipient. Reply-to Address The e-mail address the person being replied to. Reply-to Name The name of the person being replied to. Subject The subject of the e-mail. Body The body text of the email. This field accepts JavaScript set off between "$" characters. For complete information on using JavaScript in forms, see the section Scripting in forms. Include Form Values Specifies whether to include in the message body the information that the website visitor entered in the form fields. Include Form Uploads Include as an attachment any files uploaded in the previous step.
Set Info From Session in Formscope
The Set info from session in formscope takes a value from the specified XperienCentral session and adds it to the current form scope. This is the opposite of what the "Add value to session" handler does.
To add information from the session to the form scope, follow these steps:
- Select "Set info from session in formscope" from the list of handlers.
Enter the following information in the fields:
Field Description Sessionkey The key of the session that contains the information you want to add to the form scope. Prefix (Optional) The string to prefix to the data added to the form scope.
Routers
Using routers you can route the website visitor to a page, step, or URL.
The Default Routing Behavior
If you place a "Next" button on the first step of your form, then the website visitor will be automatically routed to the second step of your form. If a step is submitted by the website visitor then Interactive Forms will always route to the next step, unless it is configured otherwise. It is advised that you only configure the routing "by exception", which means you don't add any routing instructions unless you want behavior other than the default. There are two benefits of doing it this way:
- It takes less time; you don't have to add a "Go to Step" router to all the steps.
- It is less error-prone; if you change the order of the steps, then you don't have to reconfigure all the routing.
The End of the Formscope
All the data that the website visitor enters into the fields of the form is stored in the "formscope". The data in this formscope can be used for (pre)conditions and (pre)filling. The formscope is specific for each website visitor and it will be cleaned up in following cases:
- The website visitor has been idle for more than 30 minutes;
- The website visitor has been routed to some place outside the form;
- The website visitor has entered the last step of the form and that step has no handlers & routers.
When setting up the routing it is important to remember that all the data in the formscope will be removed if you route the website visitor to a page that is outside the form flow. If the data in the formscope is important, make sure it has been saved in a database before routing the website visitor to outside the form.
The "Go to Page" Router
The "Go to Page" router sends the website visitor to a specific page in the current channel. This type of routing is typically used on the last step of the form flow to navigate away from the form. To send the website visitor to a specific page, follow these steps:
- Select "Go to Page" from the list of routers.
- Click [Select Page].
- Select the page from the tree to which you want to route the website visitor.
- Click [Apply]. The page is added.
- To change the "Go to" page, click [Del].
The "Go to Step" Router
The "Go to Step" router sends the website visitor to the specified step in the current form. Without any routing specified, Interactive Forms will always route to the next form step by default. Only use this router if you want to route to another form step than the next one. To send the website visitor to a specific step in the current form, follow these steps:
- Select "Go to Step" from the list of routers.
- Select the step to send the website visitor to from the list.
- Click [Apply].
The "Go to URL" Router
The "Go to URL" router sends the website visitor to the specified URL. The URLs that are valid are browser specific, that is, any URL that is valid for the browser being used is also valid in this field. To send a website visitor to a specific URL, follow these steps:
- Select "Go to URL" from the list of routers.
- Enter the URL to which the website visitor will be sent in the "URL" field.
- Click [Apply].
Condition
Using a Condition, you can build an "if-then-else" statement combining handlers, routers, validators and even other nested Conditions. To add a Condition, follow these steps:
- Click the Condition icon.
- In the canvas, expand the condition by clicking the + button on the Condition. The Condition unfolds and consists of three parts:
- IF: Contains the condition that determines if either the THEN part or the ELSE part will be executed. If the condition is true, then the THEN part is executed, otherwise the ELSE part. Setting up the condition works in exactly the same way as the precondition of a form element.
- THEN: Contains the items that will be executed if the IF condition is true. This may contain any combination of handlers, routers, validators and also new Condition elements.
- ELSE: Contains the items that will be executed if the IF condition is false. This may contain any combination of handlers, routers, validators and also new Condition elements.
To add items to the Condition element, you first have to place those items on the canvas next to the Condition. After that is done, you can drag and drop those items into the Condition element. - Click the item that you want to move to the Condition with the left mouse button and keep the left mouse button depressed.
- Drag the item to the "THEN" field.
Repeat the steps above to add the router to the "ELSE" field.
- Next to "IF", select whether the condition is based on an element in the step or a free expression.
- Expand the handler(s)/router(s) in the condition and define them. For complete information on using routers and handlers, see the section Form Step Properties.
Validators
A form step can have validators assigned to it to validate information gathered in the step. By default, Interactive Forms does not make use of step validators. However, your developer can extend the Interactive Forms module to use validators for a step. Consult with your application manager and/or developer for complete information on using custom form validators.
Back to top