You can retrieve all content items in your project using the XperienCentral search functionality. While you select a page or page section from the Site Structure Widget or Page Section Widget in order to edit it, all other content items stored in the Content Repository can only be retrieved using search.You can search for content using a variety of facets. This topic explains how to locate content in XperienCentral using its search capabilities.
Tip
If you have write access to a content item, another way to quickly locate it is to use My Content Items.
In This Topic
Quick Search
The XperienCentral Quick Search function allows you to search through all content items (page, article, page section, etc.) using a string or partial string including wildcard characters. The search includes both the name of a content item and content within the content item. The Search function appears at the top middle of the Workspace:

When you enter a search term or terms, the 20 most relevant content items that contain the specified text are shown in a list. Select the item from the list, and it appears in the Workspace.
The list of found items is sorted according to relevance. The "Top hit" is the content item that XperienCentral finds the most relevant based on your search term(s). The rest of the content items that match your query are listed below the "Top hit". If you cannot find what you are looking for using the Quick Search, select the option Go to the Advanced Search to do an advanced query that contains multiple filters that you can use to find what you are looking for.
You can also search for content items according to their internal ID/version ID. To look up the ID/version ID of a content item, navigate to the Status tab of the Properties pane. To search for a content item according to its ID/Version ID, enter a full or partial string in the Search field. All content items/versions that contain the string you specify will be returned.
The keyboard shortcut "/" puts the focus in the Quick Search field.
Advanced Search
Using XperienCentral's advanced search functionality, you can perform sophisticated queries based on metadata contained in all content types. You can search based on any metadata present including author, publication date, keyword terms, and so forth. By specifying several search criteria, you can quickly and easily narrow your search for the exact content item or items you are looking for. When you specify more than one metadata criteria, they have an "AND" relationship with each other, which means that only the content items that match all criteria will be returned. If you specify more than one criteria within the same category, they have an "OR" relationship with each other.
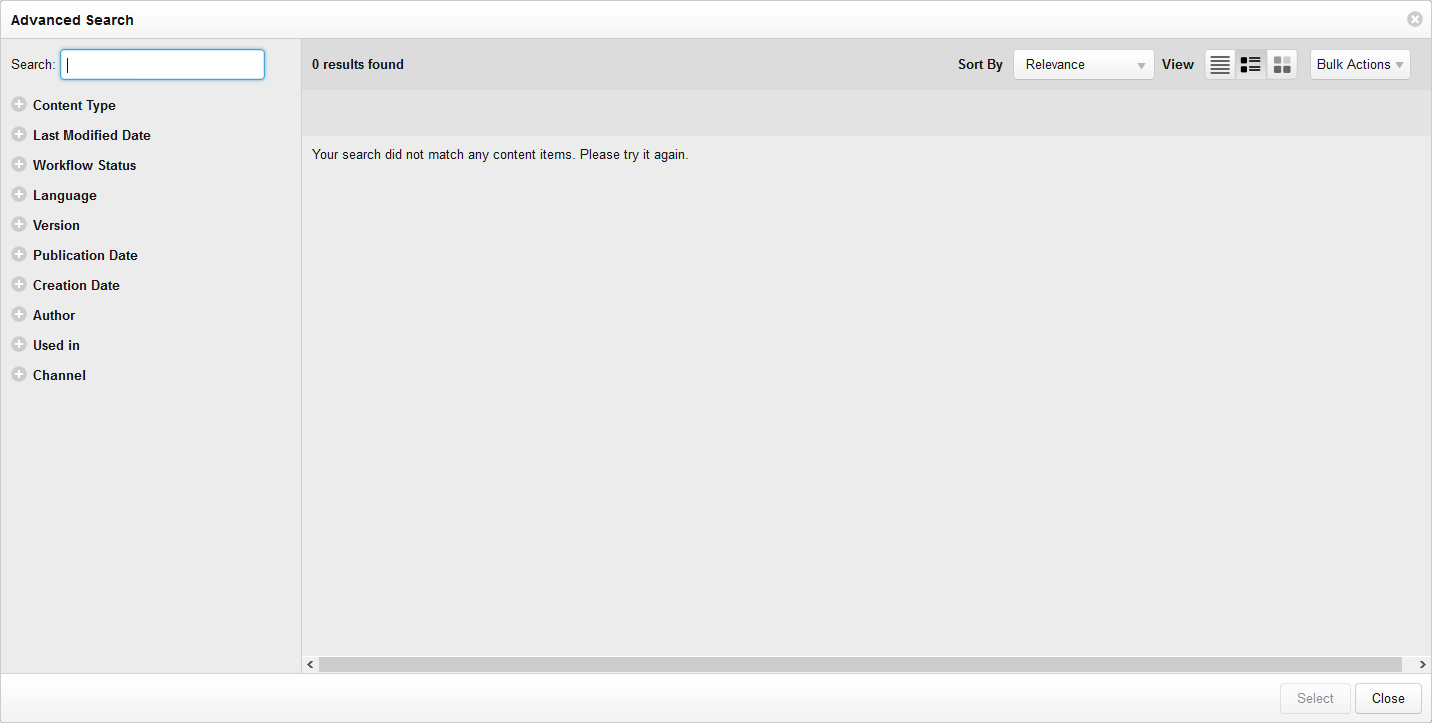
The Advanced Search window consists of a pane on the left side where you can select the metadata against which you want to search, at the top there are buttons with which you can select how the results appear, and a main pane where the search results are shown. When the Advanced Search window initially appears, the results of the last quick search (if any) are shown in the "Results" pane.
The Advanced Search functionality is especially useful for websites that contain a large number of content items. When multiple editors produce dozens or hundreds of pages, articles, and other content items, it can be difficult for everyone to be able to locate a specific content item from memory.
To open the Advanced Search panel, click the magnifying glass icon in the search field:

The Advanced Search panel opens. For example:
You can also open Advanced Search using the keyboard shortcut "s" when not in editing mode.
Advanced Search Facets
In the left pane of the Advanced Search pane you find the facets that you can use to locate content items:
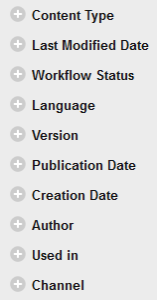
Expand a section below for more information on how to use a specific facet.
For some facets, the condition(s) that it tracks must be met in order for it to appear. For example, if no interactive form has been placed on a content item, the "Form Usage" facet will not be visible.
Content Type
Keywords (Or)
Keywords (And)
Keywords (Not)
Last Modified Date
Last Modified By
Workflow
Language
Version
Publication Date
Expiration Date
Creation Date
Author
Used in
With Ancestor
Form Usage
Channel
When you select more than one facet, they have an AND relationship with each other. For example, if you select "Page" as the content type and the workflow status "Published", the search results will only contain published pages.
Searching by Content Item ID
All content items in XperienCentral have a unique internal identifier assigned to them. Versions of content items share the unique internal content item identifier but they also have a version identifier that identifies the content item version uniquely. In the main "Search" field you can search for content items according the both the ID and version ID. When you search according to ID, all versions of the content items will be returned (if there are multiple).
To look up the ID/version ID of a content item, navigate to the Status tab of the Properties pane.
To search for a content item according to its ID/Version ID, enter a full or partial string in the main Search field. All content items/versions that contain the string you specify will be returned.
Sorting Search Results
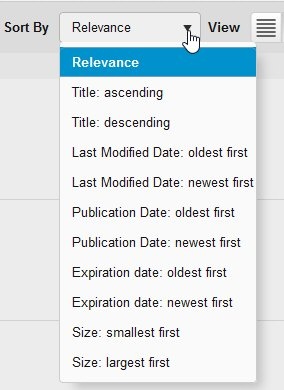
The results of an advanced search can be sorted in a number of ways. Expand the "Sort By" drop-down list:
| Sort type | Description |
|---|---|
| Relevance | Results are sorted according to their relevance. The relevance of a content item is determined using an algorithm that produces a score. The higher the score, the more relevant the content item is considered to be. The following factors all add weight to a content item's relevance:
|
| Title: ascending | Content items are sorted from A to Z according to their title. |
| Title: descending | Content items are sorted from Z to A according to their title. |
| Last Modified Date: oldest first | Content items are sorted by date with the oldest date appearing at the top of the list. |
| Last Modified Date: newest first | Content items are sorted by date with the newest date appearing at the top of the list. |
| Publication Date: oldest first | Content items are sorted by publication date with the oldest date appearing at the top of the list. |
| Publication Date: newest first | Content items are sorted by publication date with the newest date appearing at the top of the list. |
| Expiration Date: oldest first | Content items are sorted by expiration date with the oldest date appearing at the top of the list. |
| Expiration Date: newest first | Content items are sorted by expiration date with the newest date appearing at the top of the list. |
| Size: smallest first (Images and Downloads only) | Items are sorted by size with the smallest appearing at the top of the list. |
| Size: largest first (Images and Downloads only) | Items are sorted by size with the largest appearing at the top of the list. |
Toggling Between Views
The search results can be shown in different views. The following views are available:
| View | Icon | Description |
|---|---|---|
List view |
| The results are shown in a table sorted by the most recently modified content item. You can personalize the columns that are visible in the List view. See the following section for complete information. |
| Thumb view |
| The results are shown using small icons representing the content types. For each content item, the following details are shown:
|
| Grid view |
| The results are shown using large icons representing the content types along with their names and content type. |


Defining the Visible Columns in the List View
Expand the section below corresponding to your version of XperienCentral.
The following applies to XperienCentral versions R41 and higher.
In the Advanced Search List view, you can configure which columns appear in the List view table. The columns you configure appear in the current search results as well as all future searches. To configure the information columns that appear in the List view, follow these steps:
- In the List view, click the [Configure columns] button:

A dialog box will appear from which you can select the columns that you want to add to the Advanced Search List view results. The available columns are divided into four sections:- General info
- Detailed info
- SEO
- File metadata
The columns "Title", "Type" and "Status" are mandatory and can not be turned off. For example:
- To add a column, click the checkbox next to the one you want to add. To expand a section, click the up arrow next to it.

- Click [OK]. The column(s) are added.
Available Columns
The following columns can be added to the Advanced Search List view. Click the up arrow next to a section to expand it. You can sort the results by each column that you add (ascending and descending). A description of each column appears below. When you add enough columns that they can not all be displayed width-wise at the same time, a scrollbar will become available. See also Content Item Properties for a complete explanation of the properties described in the tables below.
- The ordering of the columns from left to right is not configurable.
- The width of the columns in the overview can be expanded and contracted.
| General Info | |
|---|---|
| Item | Description |
| Title | The title of the content item. |
| Type | The content item type. |
| Status | The status of the content item ("Active" or "Inactive"). |
| Author | The author (creator) of the content item within XperienCentral. |
| Image | Specifies whether the content item has an image assigned to it. If so, a check mark appears in this column. |
| Last Modified Date | The date and time that the content item was last modified. |
| Language | The language of the content item version. |
| Publication Date | The date and time that the content item was or will be published. |
| Tags and Page Labels | Lists the first six or seven tags and/or page labels assigned to the content item. |
| Detailed Info | |
|---|---|
| Item | Description |
| Lead | Shows the lead text assigned to the content item. The number of characters displayed is dependent on how the columns are currently sized. |
| Focus Point | Specifies whether the image has a focus point defined for it ("Yes" or blank). |
| Design Template | The name of the design template assigned to the content item. |
| Remark | Shows the latest remark added to the content item. The number of characters displayed is dependent on how the columns are currently sized. |
| Alternative Text | Shows the alternative text assigned to the content item. The number of characters displayed is dependent on how the columns are currently sized. |
| SEO | |
|---|---|
| Item | Description |
| Meta Keywords | Shows the meta keywords assigned to the content item. The number of keywords displayed is dependent on how the columns are currently sized. |
| Meta Description | Shows the meta description assigned to the content item. The number of characters displayed is dependent on how the columns are currently sized. |
| Meta Title | Shows the meta title assigned to the content item. The number of characters displayed is dependent on how the columns are currently sized. |
| Search Engine | Specifies whether the "Include in Search Engine" checkbox is selected in the SEO tab of the Properties panel. If so, it means the content item is included in the search engine. For non-pages, this cell will either contain "Yes" (included), blank (not included) or "Inherit from page" which means the content item will be included in the search engine if the page it displays on is. |
| File metadata | |
|---|---|
| Item | Description |
| File Name | Shows the name of the file containing the content item. |
| File Type | Shows the type of the file that contains the content item. |
| Size (w x h) | Shows the width and height of the content item in pixels. |
| Size | Shows the size of the file on disk that contains the content item. |
| Copyright | Shows the copyright string assigned to the content item. The number of characters displayed is dependent on how the columns are currently sized. |
| File Author | Shows the author assigned to the content item. Note that this is not the author (creator) of the content item within XperienCentral but rather the "Author" property on the Basic tab of the Content Item Properties panel. The number of characters displayed is dependent on how the columns are currently sized. |
Hiding a Column
To hide a column, click [Configure columns] and clear the checkbox next to the column(s) you want to hide and then click [OK].
The following feature was added to XperienCentral in version R29. This section applies to XperienCentral versions R29 through R40.
In the Advanced Search List view, you can select which columns appear in the List view table. To do so, follow these steps:
- In the List view, expand the "Show columns" drop-down list:

The drop-down list contains all the available columns that are not currently visible. For example: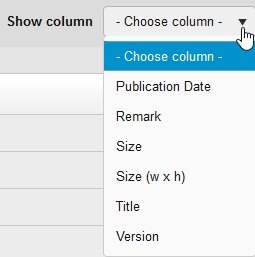
- Select a column from the list. The column is added to the table List view.
- Repeat the steps above for each column you want to add.
The ordering of the columns from left to right is not configurable.
To hide a column, click the "X" to the right of the column name. For example:

The column is hidden.
Bulk Actions
In the Actions menu of Advanced Search, you can perform bulk actions on the content items appearing in the search results.
Because it is possible for a developer to extend the bulk actions functionality in your XperienCentral deployment, you might see bulk actions in the drop-down list that are not described here. Contact your application manager or main editor for more information about custom actions appearing in your Bulk Actions menu.
Bulk Export
See Importing and Exporting Content.
Bulk Delete
You can delete multiple content items simultaneously using Bulk Actions. The bulk delete action can be applied to the result of a specific advanced search. You can select one or multiple content items in the search results for deletion.
Because you can delete potentially hundreds of content items at once and the fact that this action cannot be undone, you should naturally be very careful when using the bulk delete feature.
You cannot delete a content item using Bulk Actions if:
- You do not have permission to delete the specific content item.
- You do not have permission to delete the content type that the content item belongs to.
- The content item is shared with another channel in your project.
- The content item is the home page or the home page section.
To perform bulk actions on multiple content items, follow these steps:
- Perform an advanced search.
- With the results of the advanced search shown, click the [Bulk Actions] button in the top right part of the Advanced Search panel and select "Bulk Delete" from the drop-down:

Bulk Delete- Select Items
Click the checkbox to the left of a content item to select it for deletion. For example:
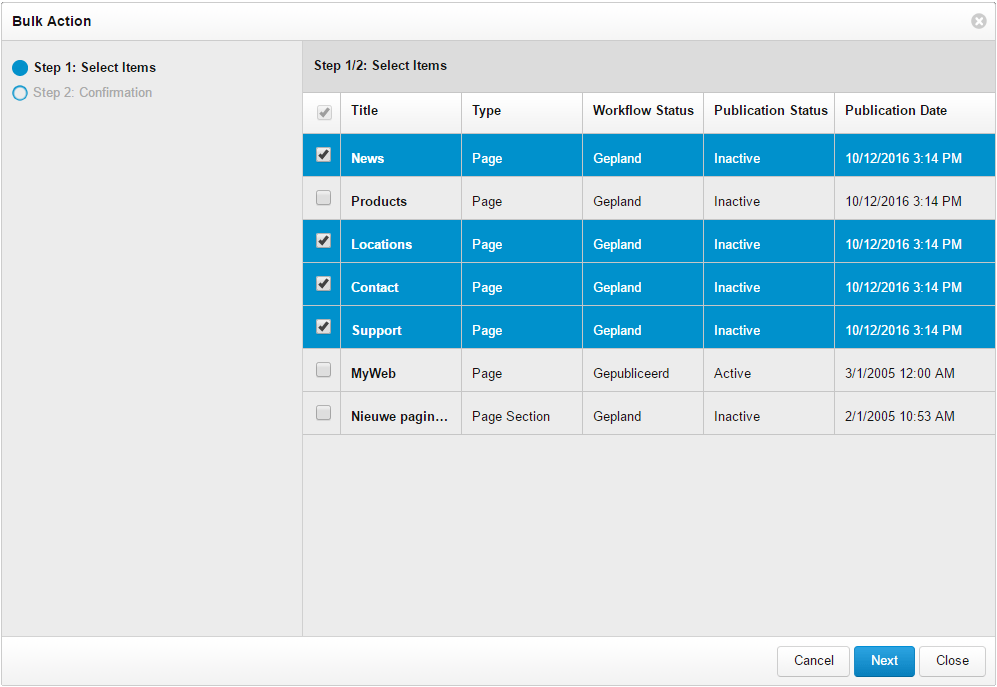
To select all content items for deletion, click the checkbox in the upper left part of the panel next to "Title".
Click [Next].
Bulk Delete - Confirm Bulk Action
On the Confirmation step, you must confirm that you want to delete the content items that you selected in step 1. To return to step 1 to double-check the content items you selected, click the link to step 1 in the upper left part of the dialog box: 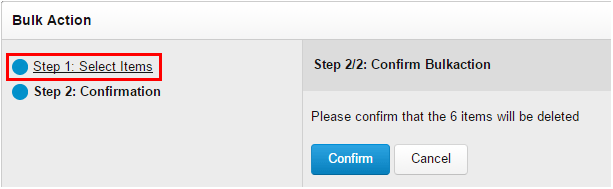
Any content items that you selected which cannot be deleted for one of the reasons described above are listed below the [Confirm] button. The reason that you cannot delete the content item(s) appears above the list.
To confirm the bulk deletion, click [Confirm]. Both [Confirm] buttons perform the same action. The [Confirm] button at the bottom right part of the dialog box is available because the other [Confirm] button can scroll off the screen if the list of content items is long.
Bulk Delete - Progress/Results
Once you click [Confirm], the progress of the bulk delete action is shown. When the bulk delete action has completed, you will see the results. For example:
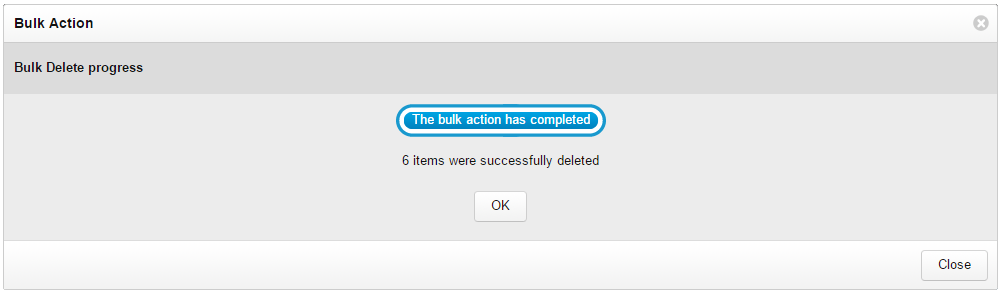
If any error(s) were encountered, they will appear in this dialog box. To return to the Advanced Search results, click [OK]. To close the Advanced Search dialog box, click [Close].
Bulk Change
The bulk change functionality was introduced in XperienCentral version R32.
Using the Bulk Change functionality, you can perform two different operations on multiple content items at the same time: add, change or remove tags from content items or change content item type from article to page and vice versa. When you convert a media item to a page, you have the option of converting any tags assigned to it to a page label and, conversely, when converting a page to a media item, page labels can be converted to tags.
To perform bulk change actions on multiple content items, follow these steps:
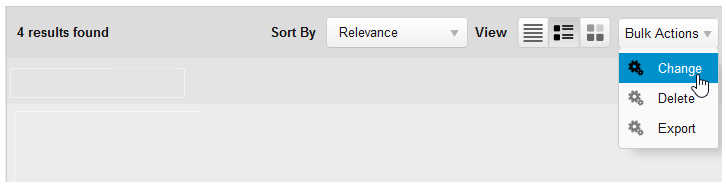
- Perform an advanced search.
- With the results of the advanced search shown, click the [Bulk Actions] button in the top right part of the Advanced Search panel and select "Change" from the drop-down:
Bulk Change Action- Select Items
- Click the checkbox to the left of a content item that you want to change.
- To select all content items, click the checkbox in the upper left part of the panel next to "Title".
- Click [Next].
Change Tags
To change tags in multiple content items follow these steps:
Select "Change tags":
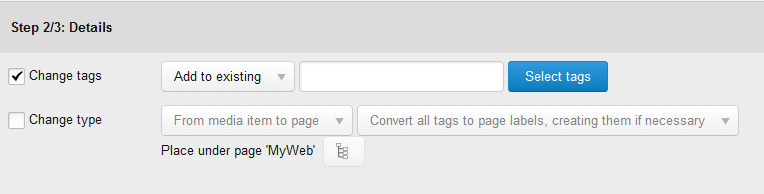
Select the action to perform on tags in the selected content items from the drop-down list. The options are:
Action Description Add to existing The tag(s) you select will be added to the existing tag(s) in all the selected content items. Remove all existing All existing tags will be removed from the selected content items. Replace all existing with The tag(s) you select will replace all existing tags in the selected content items. Find and remove The tag(s) you select will be removed from all the selected content items. - Click [Select tags].
- Click a tag in the "Available tags" column and then click [Add]. The tag is added to the "Selected tags" column. Repeat this step to add multiple tags.
- Click [Apply]. The Tag selection dialog box closes.
- Click [Next]. You proceed to the Confirmation step.
- Click [Confirm]. The content items are processed. You will see a summary of the results.
Change Type
You can convert content from one type to another. The supported conversions are from page to article and from media item to page. All custom media item types that support XperienCentral content elements can be converted to a page. A subset of the metadata from pages and native XperienCentral media types (articles) is also converted in the process, however, custom metadata cannot be converted and will be lost if you convert a custom media item to an XperienCentral page. In all cases, converted content items are in the inactive state after the conversion.
To convert content items from one type to another, follow these steps:
- Select "Change type":
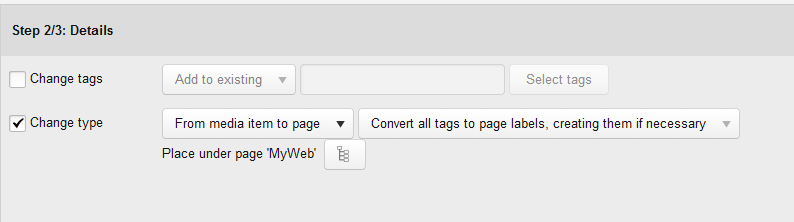
Select the conversion type from the drop-down list. The options are:
Convert Option Description From media item to page Converts articles and custom media items that support XperienCentral content elements to a page. You select where in the tree structure you want the converted media items to be placed. From page to article Converts a page to the XperienCentral article media item type. From page to test modular content type
This option was introduced in XperienCentral version R37.
Converts a page to a Modular Content template.
The conversion options "From media item to page", "From page to article" and "From page to test modular content type" are the default options in a clean XperienCentral environment. Your XperienCentral deployment can contain other content item types to convert to or from. The list is dependent on the custom media item types that have been developed and deployed in your XperienCentral environment. The metadata conversions described below do not vary.
Select what happens to metadata during the conversion. The options are:
From media item to page
Metadata Conversion Description Convert all tags to page labels, creating them if necessary All tags in the media items will be converted to page labels. If the page label does not already exist, it will be created. Convert tags to page labels if they already exist Tags will be converted to page labels only if the page label already exists. Do not convert the tags to page labels No tags will be converted to page labels. From page to article and From page to test modular content item
Metadata Conversion Description Convert all page labels to tags, creating them if necessary All page labels in the pages will be converted to tags. If the tag does not already exist, it will be created. Convert page labels to tags if they already exist Page labels will be converted to tags only if the tag already exists. Do not convert page labels to tags No page labels will be converted to tags. - If you are converting a media item to a page, click the page tree icon next to "Place under" and select the parent page of the converted pages in the "Select Page" dialog box.
- Click [Next]. You proceed to the Confirmation step. If there are any issues with the conversion, they will be listed in a table. All properties listed will be lost during the conversion. Do not proceed if you do not want to lose the specified metadata.
- Click [Confirm]. The content items are processed. You will see a summary of the results of the conversion.