| Anchor | ||||
|---|---|---|---|---|
|
In This Topic
| Table of Contents | ||||||
|---|---|---|---|---|---|---|
|
...
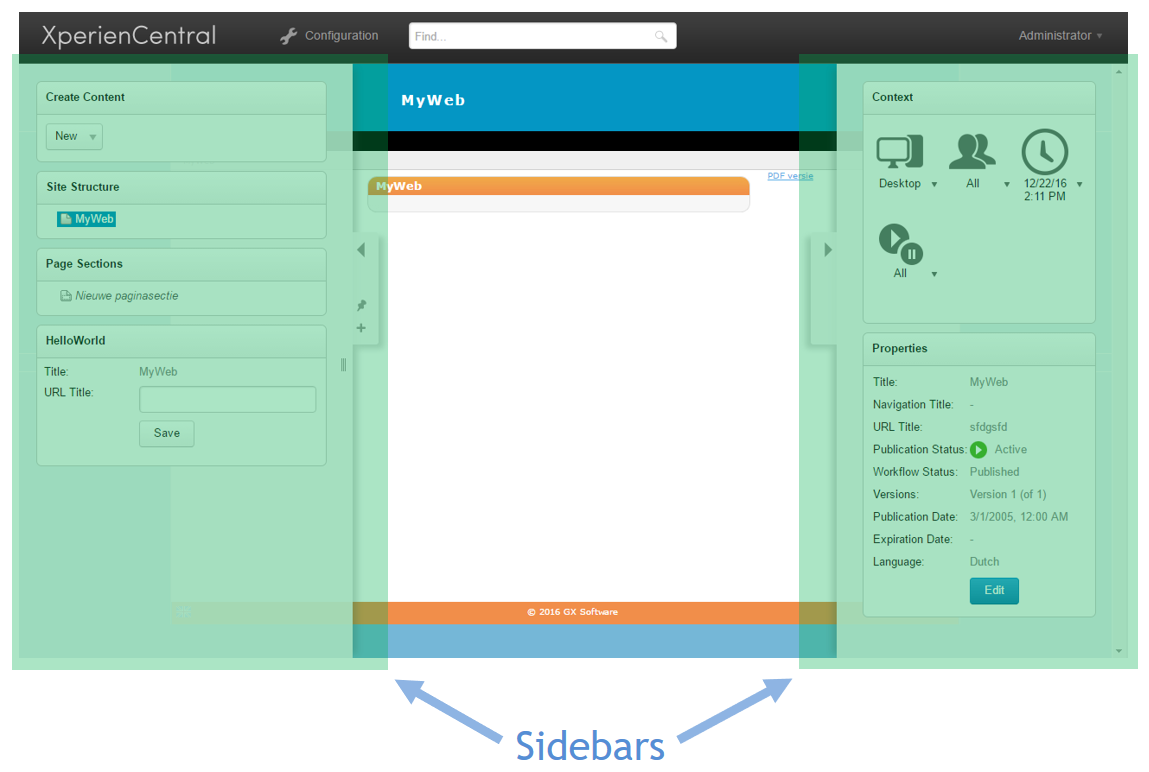
Creating a Sidebar Widget
...
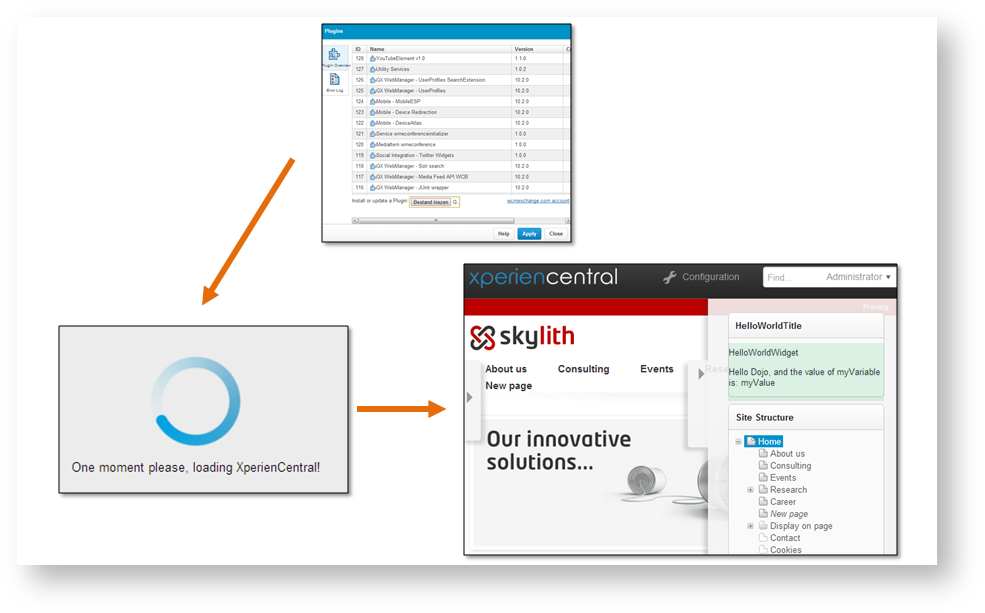
Thereafter, it can be deployed just like any other plugin by navigating to Configuration > Plugins in the XperienCentral Workspace. After installing the plugin, you need to refresh the XperienCentral Workspace in order to make new widgets available to be added to a Sidebar.
Related subjects: Plugins / Archetypes
...
The Generated Files and Directories
...
The most interesting files for the Sidebar widget are the HTML, .CSS and JS files in the resources, since these are specific for widget plugins. The Activator class is the starting point of every plugin and defines the different parts the plugin consists of and what should happen next. For general information on XperienCentral plugins you can find information on the Plugins page and its subpages, such as the section about Authorization in Plugins. One part of the Activator is specific for widget plugins, namely how a DojoModule is defined. The DojoModule Java class is used to register the client-side component in XperienCentral to define where to find its client-side code when loading it and to access language-specific strings. Consider the following code snippet:
| Code Block | ||||
|---|---|---|---|---|
| ||||
    private DojoModule getSidebarModule() {
        // The module id should start with the plugin id
        String moduleId = WCBConstants.WCB_ID + ".sidebar.helloworldsidebarwidget";

        // The path maps onto the src/main/resources/dojotype/<plugin ID>/sidebar/${classprefix}.js file
        String path = WCBConstants.WCB_ID + "/sidebar/HelloWorld";
        DojoModule module = new DojoModuleImpl(moduleId, ModuleType.SIDEBAR_WIDGET, TITLES, DESCRIPTIONS,
                "GX Software B.V.", "resources/helloworldsidebarwidget.png", path);
        return module;
} |
...
Above, you can see how the icon (helloworldsidebarwidget.png) is registered. This is the icon that is associated with the widget in the Workspace. You can also see that TITLES and DESCRIPTIONS are passed to the constructor of the Dojo module. These are maps that define the title and description of the widget in the supported languages. The description is shown when adding the widget to the sidebar. These two constants indirectly refer to the message files for Dutch and English (messages_en_US.properties and messages_nl_NL.properties) where the actual strings are defined.
The DojoModule defined here is added to the ComponentDefinition like this:
...
The languageResource.js files define the conversion from technical identifiers to easy readable texts in different languages. There is one file for each supported Workspace language. The default resource file is for English and the one in the NL directory is for Dutch. If other languages are supported, they are contained in a directory which is named after the ISO 639-1 standard langugae identifier codes (SP for Spanish, FR for French, DE for German, and so forth. The same identifiers are defined in all language resource files, but the strings they refer to are translated in the different languages. The language definitions are in JSON format which is very commonly used on the internet:
| Code Block | ||||
|---|---|---|---|---|
| ||||
define({
	root : {
		title : "Title:",
		urlTitle : "URL Title:",
		save : "Save",
		savedSuccessfully : "Saved successfully",
	},
	'nl' : true
}); |
HelloWorld.html
...
| Code Block | ||||
|---|---|---|---|---|
| ||||
<div class="helloworldsidebarwidget">
  <div class="divRow">
    <div class="propertiesLabel">${i18n.title}</div>
    <div class="propertiesValue" data-dojo-attach-point="_titleNode"></div>
  </div>
  <div class="divRow">
    <div class="propertiesLabel">${i18n.urlTitle}</div>
    <div class="propertiesValue">
      <input type="text" data-dojo-type="dijit/form/TextBox" data-dojo-props="trim:true" data-dojo-attach-point="_urlTitleNode" />
    </div>
  </div>
  <div class="divRow">
    <div class="buttonRow"></div>
    <div class="propertiesValue">
      <button data-dojo-type="dijit/form/Button" data-dojo-attach-point="_saveButton">${i18n.save}</button>
    </div>
  </div>
</div> |
The above is an example of an HTML template which is partial HTML that defines the user interface of the Sidebar widget. This HTML file, together with HelloWorld.js defines a Dojo widget. If you're not familiar with the Dojo Toolkit, see the Sidebar Widgets topic.
...
Common CSS styling of the HTML is defined in HelloWorld.html. Note that every CSS selector starts with the identifier of the plugin (Artifact ID or plugin ID). This matches the class of the top level tag in the HTML. It is important to separate the CSS of different widgets from each other and from other CSS used within XperienCentral. When you start adding your own CSS selectors, remember to always start by matching this identifier. For example:
| Code Block | ||||||
|---|---|---|---|---|---|---|
| ||||||
.helloworldsidebarwidget {
	margin: 8px;
}

.helloworldsidebarwidget .propertiesOverview {
	display: table;
    width: auto;
} |
...
The array passed to the declare statement defines the classes this Dojo class inherits from. The constructor and postCreate functions have special meanings in Dojo and are called during different stages of the initialization of the class. First constructor initializes class variables and then the postCreate initializes the user interface. The methods are not mandatory and often there is no need to override the constructor (more information from the Dojo documentation).
| Code Block | ||||
|---|---|---|---|---|
| ||||
define([
  ...
  "dojo/text!./HelloWorld.html",
  ...
  "dojo/i18n!./nls/languageResource",
  ...
  "dijit/form/TextBox",
  "dijit/form/Button"
], function (..., template, ..., languageResource, ...) {

  return declare([SidebarContentItemWidget, _TemplatedMixin, _WidgetsInTemplateMixin], {
    templateString: template,
    i18n: languageResource,

    // Attach points

    // Variables

    constructor: function () { ... },

    postCreate: function () { ... },

    _xxxxxxx: function () { ... },

    _yyyyyyy: function () { ... }
  });

}); |
...
Prefixing a function name with an underscore (_) is a convention for telling human readers of the code that a function is private. This encapsulation is not enforced by JavaScript interpreters. Never use properties and methods of other classes which are prefixed with an underscore.
...
When overriding methods (functions) in Dojo, you should always call the parent method unless you explicitly want to prevent it from being executed. Simply use the arguments variable as in the example below to pass on the method arguments. This is variable is available in all JavaScript functions, not only in Dojo.
| Code Block | ||||
|---|---|---|---|---|
| ||||
    postCreate: function () {
      // simple super call with the same arguments.
      this.inherited(arguments);
      ...
} |
...
The code below, extracted from the archetype shows how to connect the event handler function _updateData to the event contentItemChange and the event handler _handleSave to the click event of the button called _saveButton:
| Code Block | ||||
|---|---|---|---|---|
| ||||
      // to prevent memory leaks when the widget is destroyed
      this.own(
        // update the view when the content item changes (event).
        on(this, "contentItemChange", lang.hitch(this, this._updateData)),
        // add a handler for the save button
        on(this._saveButton, "click", lang.hitch(this, this._handleSave))
); |
...
The Dojo keyword on is used to subscripe to events. The lang.hitch(...) construction is a trick to pass on the this reference, referring to the widget itself, to the event handler when it is called.
...
Finding events available for subscription for standard Dojo widgets can be done in a similar way. In HelloWorld.html you can see that the full type of the button is dijit/form/TextBox. Look this class up in the Dojo API Documentation - expand the Event Summary to see all available events.
...
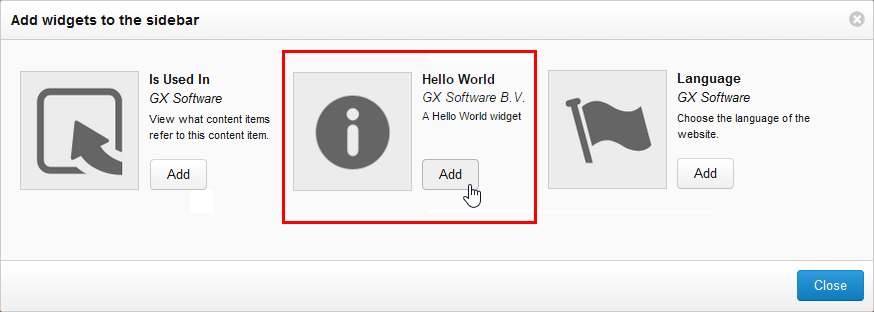
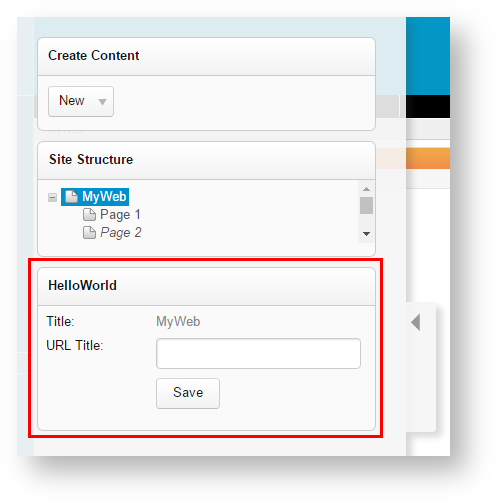
Adding the Widget to XperienCentral
Generate, build and deploy the plugin containing the "Hello World" widget in XperienCentral. In the Workspace. The widget is now available to be added to a Sidebar. Click the (+) icon on one of the sidebars and click the [Add] button for the "Hello World" widget. The "Hello World" widget will be added to the Sidebar:
JSDoc
JSDoc is comparable to JavaDoc, except that it is markup for JavaScript instead of Java code. Our JSDoc documents the client side API of XperienCentral. It is delivered with each release, but it is also available online: https://api.gxsoftware.com/jsdoc. It shows a tree view and is also searchable. To find the class mentioned above, perform the following steps: Search for the class SidebarContentItemWidget. (You need to click it in the tree view after searching.) Then, expand the Event Summary. Here you see: "Content item change event that published when the current content item changes in the editor". Further you can see that the event handler takes an argument called contentItemInfo. If you look it up you find out the argument has two properties, identifier and versionIdentifier which you can access in you event handler. Here you can see how the properties are used in the handler defined in the archetype:
| Code Block | ||||
|---|---|---|---|---|
| ||||
    // get the information and update the view
    _updateData: function (contentItemInfo) {
      ContentManagement.getContentItemVersion(contentItemInfo.identifier, contentItemInfo.versionIdentifier).then(lang.hitch(this, function (version) {
        this.version = version;
        // update the title in the DOM
        this._titleNode.textContent = version.title;
        // update the Navigation title in the text box
        this._urlTitleNode.set("value", entities.encode(version.urlTitle));
      }));
} |
What have we learned?
We have seen how a Sidebar widget can be generated using a specialized archetype, how to build it and how to add it to the XperienCentral Workspace. Further we have examined the different files generated to get a good understanding on what they are for. After that we explored the JavaScript code containing the actual implementation of a Sidebar widget. This hopefully has imparted enough information to understand where to start adding your own code for your specific needs.
Training Resources
...
Training Resources
GX Software offers courses in developing plugins GX Software offers courses in developing plugins for XperienCentral. These highly recommended courses put you on the fast track to developing plugins that add custom functionality to your XperienCentral installation. For complete information, see the Training Courses topic on our corporate website.