...
A persona is a definition of a specific group of website visitors. The definition is based on behavioral or personal properties it allows you to view the website through the eyes of the specific persona. The "Personas" functionality works together with personalization expressions that have been applied to your website content. For example, you can use a persona to view your website as it will be seen by visitors who are logged in or who have registered themselves with the website and created a user profile.
Personas work hand in hand with content personalization. When content has been personalized with a Personalization, you can preview how the content item will appear to the visitor belonging to the Persona. For complete information on personalizing content, see Personalizations.
...
- Navigate to Configuration > Personas.
- Click [Add Persona]. A new Persona with empty details appears.
Define the following properties:
Property Description Name The name of the persona. This name appears in the list of Personas as well as in the drop-down list in the Context Widget. Description The description of the Persona. It should explain which group of website visitors it applies to. The description only appears in the Persona Details section. Persona image Click [Browse] to select an image, or avatar, to use for this Persona. The avatar you select appears together with the name of the Personal Persona in the last list as well as in the drop-down list in the Context Widget. - Click [Save].
...
In the Advanced Settings, you define the facet of visitors that the Persona applies to. This is done by enter entering XML that defines the group by use of properties retrieved from the user profiles. For example, "Logged in", "Registered", "Opened newsletter" and so forth. When a website visitor is a match with the defined properties, the Persona applies to him or her.
Expand the section by clicking the "Advanced Settings" link. The "User Session" field appears. Enter XML that defines the website visitor profile properties and values that make this persona applicable to a website visitor. For example:
<userprofile>
   <profile>
      <properties>
         <property>
            <id>interested_in</id>
            <values>
               <value>Training</value>
            </values>
         </property>
      </properties>
   </profile>
</userprofile>
Personalisation example: /root/system/userprofile/profile/properties/property/values/value = 'Training'
For example: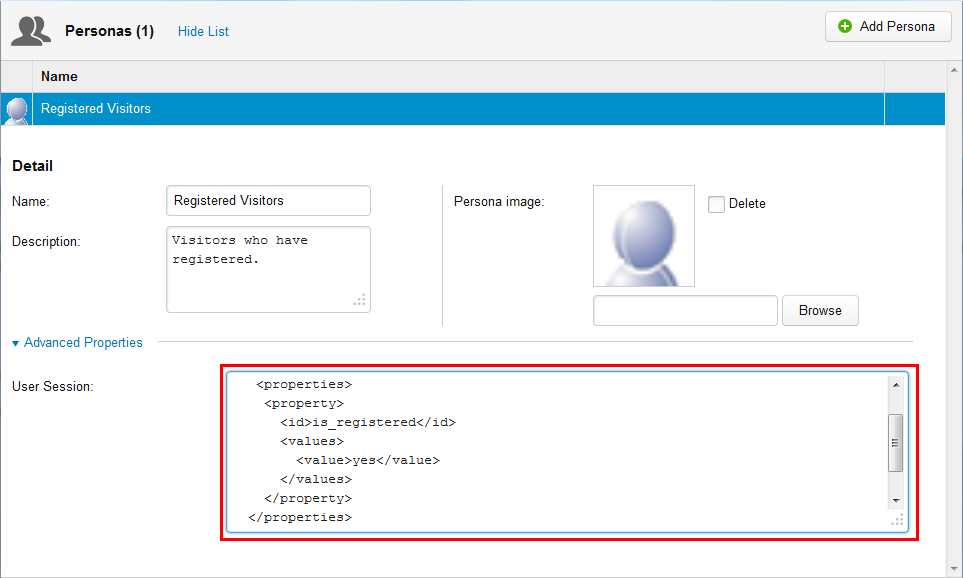
...
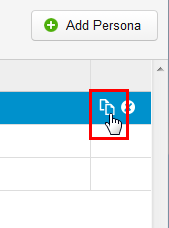
Copying a Persona
You can quickly and easily make a copy of a Persona. This makes it possible to create a new Persona based on an existing one and then make the necessary modifications. To copy a Persona, hover the mouse over the name of the Persona in the list and click the "Copy" icon:
A copy of the Persona appears. By default the name of the new Persona is "Copy of [Persona name]".
...
Deleting a Persona
...
To delete a Persona, hover the mouse over the name of the Persona in the list and click the "Delete" icon:
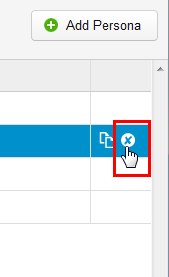
Click [OK] to confirm the deletion.
...