Notes
- This topic is meant for the main application manager or a similarly privileged XperienCentral user.
- This topic applies to XperienCentral versions R42 and higher.
In This Topic
Login Page Parts
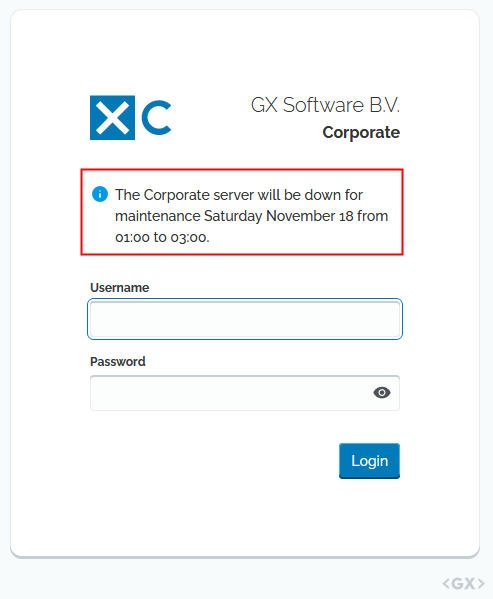
The following shows an example XperienCentral Login page.
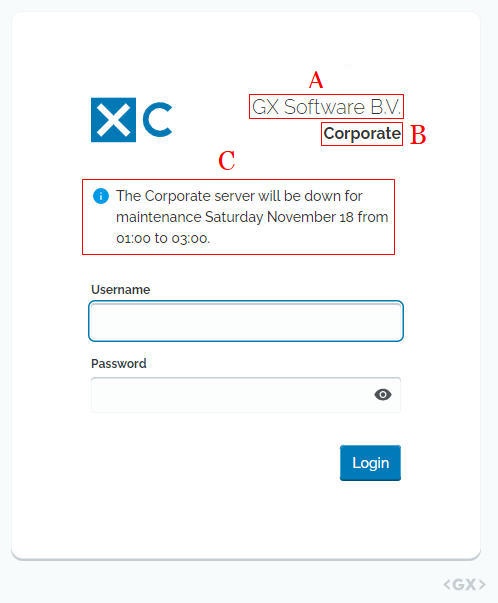
The three parts of the Login page that you can customize are:
A - Company Name
B - Channel Name
C - Announcement
Customizing your Company Name
A company name (A) does not appear on the XperienCentral Login page by default, however you can add one. To do so, follow these steps:
- Open the XperienCentral Setup Tool.
- Navigate to the General tab.
- Search for the setting
company_namein theapplication_settingssection. - In the field next to
company_name, enter the string that you want to appear on the Login page above the Channel name. For best results limit the string to 25 characters (including spaces) or less. - Scroll to the bottom of the Setup Tool and click [Save Changes]
The company name you configured will now appear on the Login page for all users just above the channel name. For example:
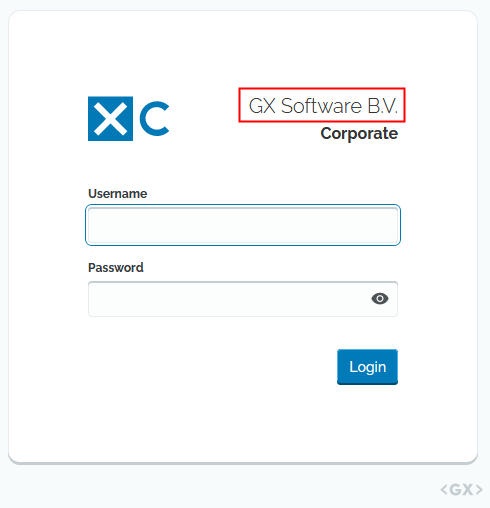
While the name of the setting is company_name, you can add any string you want to appear at this position on the Login page.
Customizing the Channel Name
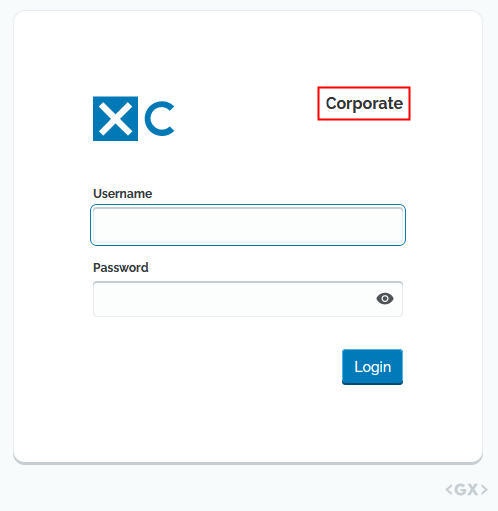
The name of the channel (B) that displays on the Login page is taken from the "Title" field on the General tab in the Channel Configuration panel. To show a different Channel name on the Login page, modify the title of the channel. The following shows a channel name on the Login page:
Before changing the name of a channel in XperienCentral, you should determine whether the naming convention has dependencies on other parts of your project or vice versa, especially projects that contain multiple channels.
Customizing the Announcement
By default, no announcement (C) is shown on the XperienCentral Login page, however you can add one. The Announcement text is defined in My Settings. See Announcement for complete information. For example: