In order to be able to grant users read access to web pages, they must belong to a group. Authorization for viewing specific web pages is granted to groups at the page level. All users who belong to the group automatically have authorization to the view pages for which the group has been assigned read access.
In This Topic
Creating Web Groups
To create a web group, follow these steps:
- Navigate to Configuration > User Profiles.
- Click the [Groups] tab.
- Click [Add Group] (see A below). In the "Group Information" section, "New group" appears in the name field (see B ):
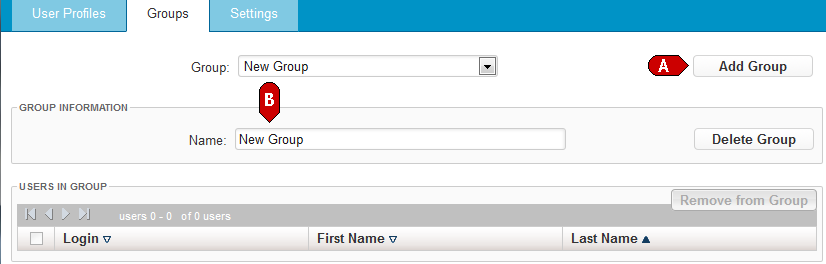
- Highlight "New group" and type the name you want to assign to the new group.
- Click [Apply]. The new group is now added. For example:
Adding a User to a Group
Users can be assigned to groups. Authorization to view specific website pages is granted to groups at the page level. In order to assign a user to a group, you must first create the group as described in the section Creating Web Groups.
To assign a user to a group, follow these steps:
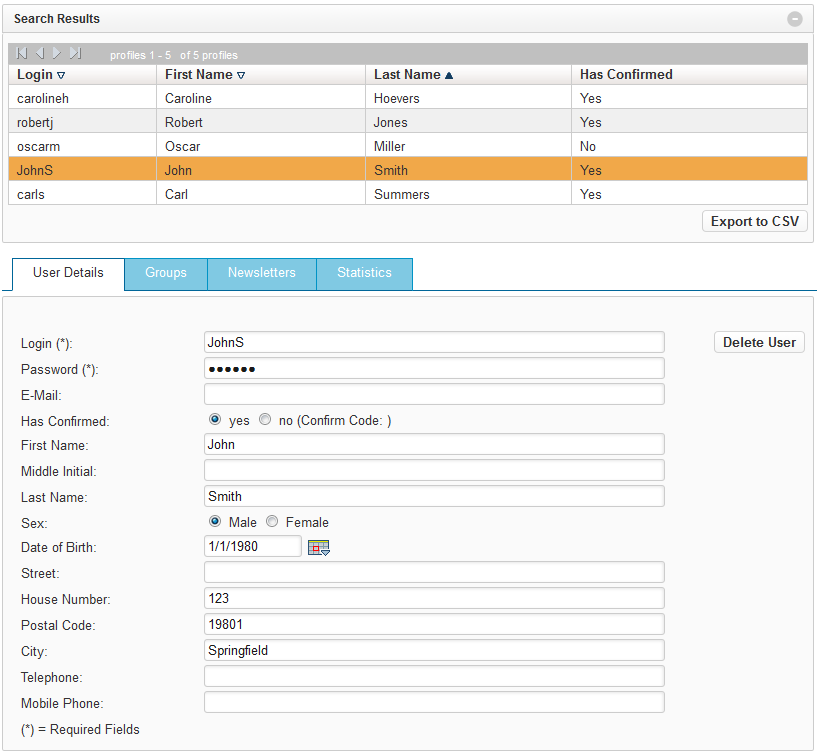
- Perform a search for the user that you want to add to a group.
- Click the user in the "Search Results" list. The user's details appear below. For example:
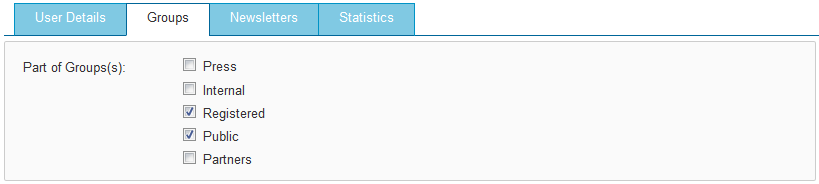
- Click [Groups] to display the list of available groups the user can be added to.
- Select the group or groups you want to add the user to. For example:
- Click [Apply]. The user is now added to the selected group(s).
Managing Web Groups
On the [Groups] tab you can view and manage groups and user group assignments. Adding a user to a group is done on the [User Profiles] tab. See the previous section Adding a User to a Group for complete information on how to add a user to one or more groups.
Once users have been added to a group or groups, you can view which user(s) belong to which group(s) and manage user group assignments.
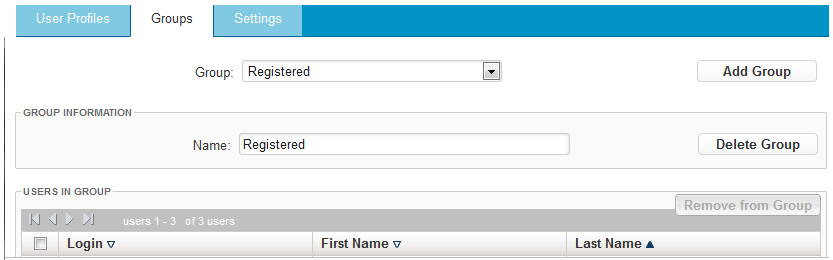
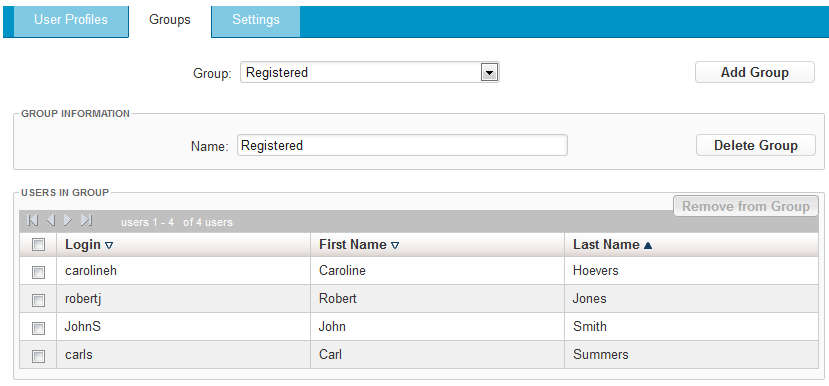
To view a group and manage its users, follow these steps:
- Click the [Groups] tab.
- Click the down arrow next to "Group:" and select the group you want to manage. The following details for all users belonging to the group are shown:
- Login name
- First Name
- Last Name
For example:
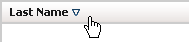
Sorting Users in the List
Users belonging to the group can be sorted in ascending or descending alphabetical order according to the three column headings. To change the sort order, click the column heading by which you want to sort the users. For example, to sort the users according to their last name, click the "Last Name" header at the top of the column:
The current sort order is identified by the dark blue triangle that appears to the right of the column header by which the users items are currently sorted:
 Indicates that the sort order is currently ascending alphabetical order.
 Indicates that the sort order is currently descending alphabetical order.
Removing a User from a Group
There are two ways to remove a user from a group — from the [User Profiles] tab and from the [Groups tab].
Removing a User from a Group from the [User Profiles] Tab
To remove a user from a group from the [User Profiles] tab, follow the steps below.
- Click [User Profiles].
- Perform a search to display the user whose group assignment you want to remove.
- Click the user in the "Search Results" list to display their details.
- Click [Groups] to display the user's group assignment(s).
- Clear the checkbox for the group or groups you want to remove the user from.
- Click [Apply]. The user is removed from the group(s).
Removing a User from a Group from the [Groups] Tab
To remove a user from a group from the [Groups] tab, follow the steps below.
- Click [Groups].
- Select the group from which you want to remove one or more users from the "Group" drop-down list.
- Select the user or users you want to remove from the group by clicking the checkbox to the left of their login name. To select all users, click the checkbox next to "Login".
- Click [Remove from Group]. The selected user(s) are removed from the group.
Renaming a Group
To rename a group, follow these steps:
- Select the group you want to rename from the "Group" drop-down list.
- In the "Group Information" section, highlight the text of the name of the group and type the new name of the group.
- Click [Apply]. The group is renamed.
Deleting a Group
To delete a group, follow these steps:
- Select the group you want to delete from the "Group" drop-down list.
- Click [Delete Group]:
- Click [OK] when prompted to delete the group. The group is deleted.