A workflow determines the state(s) that a content item can have. The state of a content item determines whether it is visible on the frontend of your website, whether it can be edited and by whom, and so forth. A workflow also determines the order that states can be moved through. For example, consider the simple workflow "Planned - Published". When a content item is first created, it is in the "Planned" state. Content items in the "Planned" state are not visible on the website frontend. When the workflow state of a content item is changed from "Planned" to "Published", it becomes visible on the website frontend. Depending on your organization, you might want to create more complicated workflows that add intermediate steps such as "Ready for Review", "Review in Progress", "Review Completed" and so forth. As content items pass through different workflow states, specific roles have specific rights to modify a content item's settings and/or content. A workflow model also defines the order that the states must be transitioned through. For example, it can enforce the condition that a content item can only move from the "Planned" state to the "Ready for review" and not directly from "Planned" to "Published".
A workflow activity can have conditions assigned to it. A condition defines the properties a content item must have or the conditions it must meet in order to be able to transition from its current state to the following state. For example, you can define the condition that a content item must have a title before it can go from the "Planned" state to the "Published" state.
You can apply a workflow to content items of the following types:
- Page
- Page section
- Content Repository items
- Interactive Forms
In This Topic
Workflow Repository Model Versus Workflow Model
A single workflow can be used for different parts of a website, however, these parts may be maintained by different user roles. For this reason, you can define a generic workflow template, which is referred to as the "workflow repository model". At the outset, this template is not yet related to any user roles, pages, page sections or Content Repository items. From the workflow, you can create one or more workflow models. A workflow model does have user roles and has been assigned to one or more pages, page sections, Content Repository items or forms. In a parent/child page hierarchy, you can specify whether the child pages inherit their workflow model from the parent page or whether they use another workflow model.
Workflow
In a workflow, the following properties are defined:
- Which activities exist within the workflow. An activity determines what actions can be performed within it: creating a new page or modifying an article, for example.
- What the initial activity of a new page, page section, Content Repository or form is ("Planned", for example).
- Which permissions are available for each activity. For example, an activity such as "Maintain planned object" allows for pages, page sections, Content Repository items and forms to be modified.
- The states the workflow contains.
- The actions the workflow contains, for example what activity the workflow transitions from when moving from one status to another.
Workflow Model
The workflow model is assigned at the level of the content item. At this level, it also determines which roles are allowed to perform specific activities. Because items in the Content Repository are unstructured, individual Content Repository items of the same type, such as an article, each use a different workflow model. The workflow model "Planned - Published" comes standard with XperienCentral. It is possible to change this workflow model or to add new workflow models.
Creating a Workflow
To create a workflow, follow these steps:
- Navigate to Configuration > Workflow.
- Click [New]. The message "Workflow is invalid. No activities defined" appears. You can ignore this message because the activities will be created in the following steps.
- Enter a meaningful name in the "Name" field and then click [Apply].
States
A state is the position the content item is currently in. In XperienCentral the state of an object is either "Public" or "Not public". The list of current states appears in the "States" section:
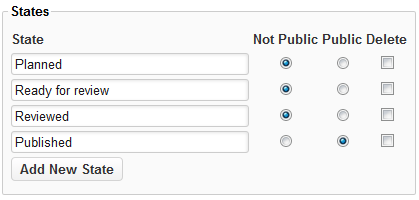
When an object is in a "Public" state, it can be visible on the frontend of the website. When it is in a "Not public" state, it cannot be visible on the frontend of the website.
Adding States
To add a state, follow these steps:
- Click [Add New State].
- Enter a meaningful name for the state in the "State" field.
- Select whether the state is "Public" or "Not Public".
- Click [Apply].
- Repeat the steps above for each state you want to create.
Deleting States
To delete a state, follow these steps:
- Select the "Delete" checkbox next to the state you want to delete:
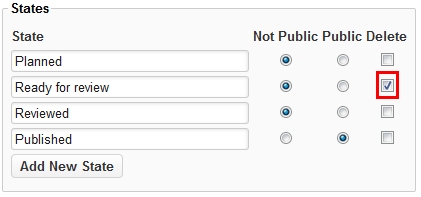
- Click [Apply]. The state is deleted.
Activities
An activity is a single step in a flow of activities, which, as a whole, is identified as a specific process within an organization. Examples of activities are "create new article", "delete page" and "review article". Each activity has a set of permissions assigned to it. Roles may be attached to activities in order to determine which roles are authorized to perform that specific activity. Multiple roles can be attached to an activity.
Adding Activities
To add an activity, follow these steps:
- Click [Add New Activity]. The new activity will appear at the bottom of the list of the workflow model.
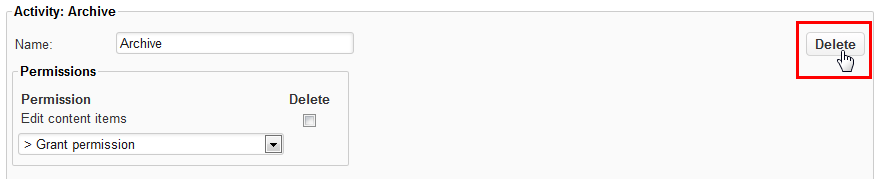
- Enter a meaningful name for the activity in the "Activity Name" field.
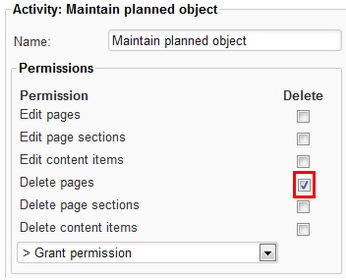
- In the "Permissions" section, select a permission from the drop-down list. These are the permissions that this activity is allowed to perform.
- Click [Apply]. The permission ise added to the list. For example:
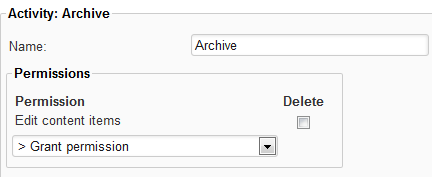
- Repeat the steps above for each permission that you want to grant the activity.
Deleting Activities
To delete an activity, follow these steps:
- Select the "Delete" checkbox next to the activity you want to delete. For example:
- Click [Delete]:
The activity is deleted.
Actions
Actions determine the flow between statuses. When the status of a content item is changed from one to another, an action determines which activity becomes the new active activity. When the new activity becomes active, its set of permissions determines what tasks can be performed on content items. With every state change, a content item becomes subject to a new activity. An activity may have multiple subsequent activities, but only one activity can be chosen as the next step in the workflow. A workflow action defines a source activity, a destination activity and the condition of the transition. Workflow actions are defined in the "Actions" section of an activity, where the source activity is the current activity, the destination activity is the "Go to activity" and the condition is the "When changed to the status" field.
Adding Actions
To add an action, follow these steps:
- Click [New Action].
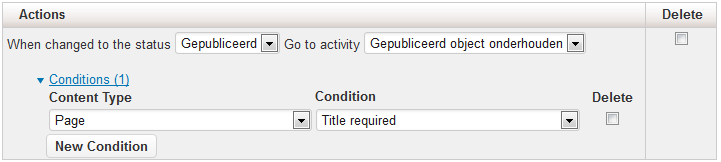
- Select a state in the "When changed to status" drop-down list.
- Select an activity from the "Go to activity" drop-down list.
- Click [Apply]. For example:

Deleting Actions
To delete an action, follow these steps:
- Select the "Delete" checkbox next to the action you want to delete. For example:

- Click [Apply]. The action is deleted.
Conditions
A condition defines the circumstance(s) under which a content item is allowed to transition from one workflow state to another. The condition is based on a specific property or condition belonging to a content item. For example, a condition can prevent a content item from transitioning from the "Planned" to the "Published" state if it does not have a title or if it does not have an expiration date assigned to it. A condition can be global and apply to all content types or you can select the specific content type to which it applies.
Adding Conditions
To add a condition to an action, follow these steps:
- Click the "Conditions" link or [New Condition].
- Select the content type that the condition applies to from the drop-down list.
- Select the condition from the drop-down list.
- Click [Apply]. The "Conditions" link will change to reflect the number of conditions that have been defined. For example:
- Repeat the above steps for each condition you want to add.
Deleting Conditions
To delete a condition from an action, follow these steps:
- Select the "Delete" checkbox to the right of the condition. For example:
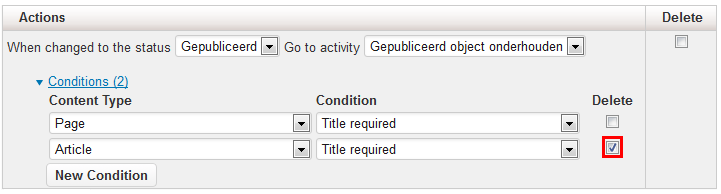
- Click [Apply]. The condition is deleted.
Copying a Workflow
It is possible to copy a workflow. This is useful in cases where you want to create a new workflow that differs slightly from an existing workflow. This allows you to quickly and easily duplicate all activities, states, conditions, and so forth within a workflow and then modify the parts of it that you want to. To do so, follow these steps:
- Select the workflow that you want to duplicate from the workflow repository model drop-down list. The properties of the workflow appear below.
- Click the [Copy] button to the right of the drop-down list. A copy of the workflow is created. By default the name is "Copy of [name of workflow]".
Publishing the Workflow
Select "Is published" when the workflow is completely configured so you can start applying the repository model to content items.
Workflow Example
In this section, an example workflow is created containing the following states:
- Planned (non-public)
- Ready for review (non-public)
- Reviewed (non-public)
- Published (public)
This figure is closely related to the state transition figure above, however, instead of states, this figure shows the activities for each state.
The activities are:
- Maintain Planned Object — used for content items that have just been created and still need to be completed. These content items are invisible to the website visitors.
- Maintain Ready for review Object — used for content items that need to be approved by the reviewer. These content items are invisible to the website visitors.
- Maintain Reviewed Object — used for content items that have been approved by the reviewer. These content items are not visible to the website visitors.
- Maintain Published Object — used for content items that have been approved by the main editor. These content items are public and are visible to the website visitors.
We will define the following authorization rules:
- The role Editor may create, delete and modify content items during the "Maintain planned object" activity of the content items. The Editor indicates when it is "Maintain ready for review object" and whenever a content item is in this activity, the Editor cannot change it anymore. However, he or she is still able to read it.
- The role Reviewer may only modify content items but only when they are in the activity "Maintain ready for review object". When finished, the Reviewer changes the state to "Reviewed", thus placing the object in the "Maintain reviewed object" activity.
- The role Main Editor may always change the state of any content item. The only state changes that this role may not apply are Planned > Reviewed, Planned > Published and Published > Reviewed.
The go from the activity Maintain Reviewed Object activity to Maintain Published Object will have the condition "Title required" which means that it cannot transition without a title.
Overview of Steps
Perform following steps to define a new workflow:
- Create a workflow — give it a meaningful name that reflects what it does
- Add the states
- Add the activities
- Grant the permissions to the activities
- Add actions, state transitions and conditions
- Publish the workflow
- Optional: set the workflow as the default
The following steps are required to implement a workflow:
- Assign a workflow to an object (page, page section or Content Repository item).
- Add roles to activities.
Troubleshooting
This section describes the common errors that can occur while working with workflows.
Error message: Workflow. The model contains multiple initiator activities.
How to solve: XperienCentral determines dynamically which activity in the workflow is the initiator activity. The initiator activity is the activity which has no preceding activity (Go to activity). This error will show if there is more than one activity without a preceding activity.
Error message: Workflow is invalid. No activities defined
How to solve: No activities have been created yet. This message will disappear when activities have been created.