You can configure your personal settings for XperienCentral. These settings relate to your personal account only. You can also perform global searches for articles, pages, page sections, images, and downloads.
In This Topic
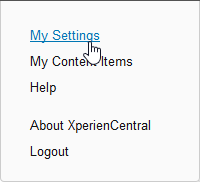
To access your personal settings, click your name in the title bar of the Workspace. For example:

Select My Settings from the drop-down menu:
The My Settings panel appears:

Personal Settings
On the My Settings tab, you can customize a number of settings that apply only to yourself. The settings are:
| Setting | Description |
|---|---|
| Current password | Your current password (masked). You can do nothing further in this field. |
| New Password | To change your password, type a new password in this field. For security reasons, it is highly recommended that you create a strong password. A strong password has all of the following characteristics:
When you type your new password into the field, the "Password Strength" field will indicate the strength of your password using different colors. The following colors are used to indicate the password's strength:
|
| Retype new password | Type your new password in this field to verify that it matches what you typed in the "New Password" field. |
| Use XperienCentral time zone | Use the time zone that the XperienCentral server uses for timestamps. |
| Use my own time zone | Select your own time zone. The timestamps that appear for you in XperienCentral will be based on the difference between the time zone that the server on which XperienCentral is installed and running and the time zone you have selected. |
| Edit language | Specifies the language to use for the XperienCentral GUI.
This setting is not synchronized with the language version of the website that you are viewing/editing. To select the language version of the website that you want to view/edit, use the Language Widget. |
| Start XperienCentral on page | Specifies the page that XperienCentral displays after starting up. Click [Search] to select a different page. If no page is selected, the home page will be the start page. |
After making any changes, click [Apply].
Announcement
Main Editors, Application Managers, and Developers can display announcements in the login screen of XperienCentral. The announcement displays for all users of the XperienCentral deployment. To add an announcement, enter the text in the "Announcement" field. When you have finished, click [Apply].
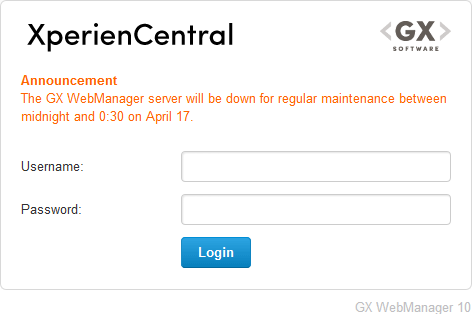
The following is an example of an announcement:
Notification Settings
Notifications allow you to monitor the entire lifecycle of content items. When you subscribe to one or more notifications with respect to a lifecycle change to an item, whenever a change occurs or is going to occur within a specified time period anywhere in the web initiative, an alert is sent to you. The notification that a specific lifecycle change has occurred or will occur anywhere on the website is triggered whenever the workflow of a content item is modified or will soon occur. When you subscribe to a specific notification type, you receive an e-mail notification regardless of who the user is who performed the action, including yourself. The name of the content item in the e-mail message is a link which you can click to navigate directly to the content item within the XperienCentral Workspace.
You can choose from the following notifications:
| Notification type | Description |
|---|---|
| Workflow state change notification | The workflow state change notification allows you to monitor the workflow state of content items. When you subscribe to workflow state change notifications, you will receive an e-mail notification when a workflow state change is made to any content item anywhere on the website. The specifics of the workflow state change that occurred is not detailed in the e-mail notification, you are simply notified that a change has occurred. The options are "Never", "Immediately", "Daily" or "Weekly". For "Daily" and "Weekly", the time of day that the e-mail is sent is based on when this setting is configured. For example, if you change this setting at 3:00 p.m., you will receive the notification at 3:00 p.m. (according to the frequency you select). |
| Expiration date notification | The expiration date notification allows you to monitor which content items are about to expire. The options are "Never", "Daily", and "Weekly". For "Daily" and "Weekly", the time of day that the e-mail is sent is based on when this setting is configured. For example, if you change this setting at 3:00 p.m., you will receive the notification at 3:00 p.m. (according to the frequency you select). When the number of days before the item is set to expire is reached, an e-mail notification will be sent to you that lists the item(s) and the date on which they will expire. To set the number of days before the expiration an e-mail is sent, see Notification Framework. |
| Retention period notification | The retention period notification allows you to monitor content items whose content has not changed for a specified number of days. These are referred to as 'retained items'. Using the retention period notification you can ensure that content on your website remains current and up to date. When the content of an item remains unchanged for the specified number of days, an e-mail notification will be sent to you that lists the item(s) and the number of days they have remained unchanged. The options are "Never", "Daily" and "Weekly". For "Daily", the e-mail will be sent every day at 02:00. For "Weekly", the day and time that the e-mail is sent is based on when this setting is configured. For example, if you change this setting on a Monday a 3:00 p.m., you will receive the notification every Monday at 3:00 p.m. When the content item has remained unchanged for the specified number of days, an e-mail notification will be sent to you that lists the item(s) and the date on which they were last modified. To set the number of retention days, see Notification Framework. |
| Deletion notification | The deletion notification allows you to monitor content items that have been deleted. The options are "Never", "Immediately", "Daily" and "Weekly". For "Daily", the e-mail will be sent every day at 02:00. For "Weekly", the day and time that the e-mail is sent is based on when this setting is configured. For example, if you change this setting on a Monday a 3:00 p.m., you will receive the notification every Monday at 3:00 p.m. |
After making any changes, click [Apply].