In This Topic
This topic explains how to configure Eclipse to maximize the ease of plugin development. The following steps will be performed in order to enable XperienCentral development in Eclipse:
- Create a plugin based on an archetype.
- Create a project file for Eclipse.
- Create a project within Eclipse.
- Build and deploy the plugin in Eclipse using one-click.
In this quick start guideline it is assumed that you have already installed and configured the Windows environment variables for Maven, available from http://maven.apache.org/download.html.
Create a Plugin Based on an Archetype
If you would like to continue developing an existing plugin, skip this part. The first step is to create a plugin that is based on an archetype. This part assumes that you created a plugin based on an element archetype. For complete information on performing this step, see Creating the helloWorld Element Plugin.
Create a project file for Eclipse
After the plugin has been created, use Maven to create a project file for Eclipse in which you reference the required libraries (as defined in the pom.xml of your plugin). Open a command window and enter the following commands:
cd C:\GX\plugin\helloworldelement
mvn -s C:\GX\XperienCentral\settings.xml clean install
mvn -s C:\GX\XperienCentral\settings.xml eclipse:eclipse
If the Java Software Development Kit is not assigned as JAVA_HOME in the Windows environment settings, a message warning that the tools.jar cannot be found will display. JAVA_HOME must be correctly set to the Java Software Development Kit (JDK), not the Java Runtime Environment (JRE) folder.
Create a Plugin Project in Eclipse
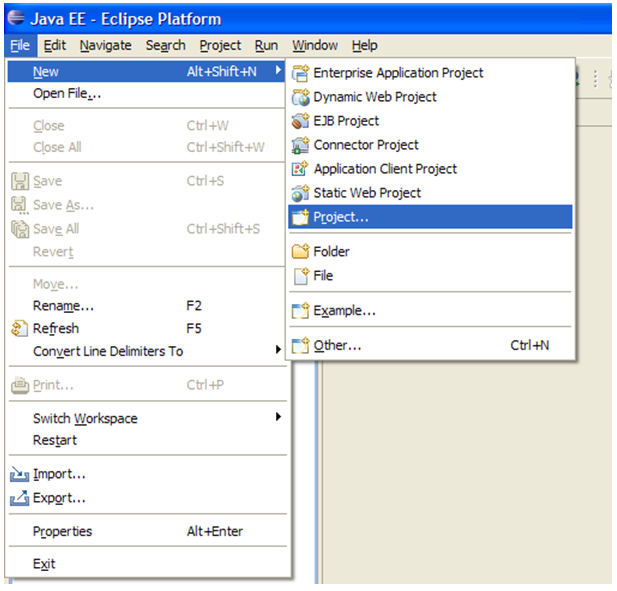
Each plugin is a separate Eclipse project. To create an Eclipse project for a plugin, perform the following steps:
- Navigate to File > New > Project…
- Select Java > Java Project and click [Next]:
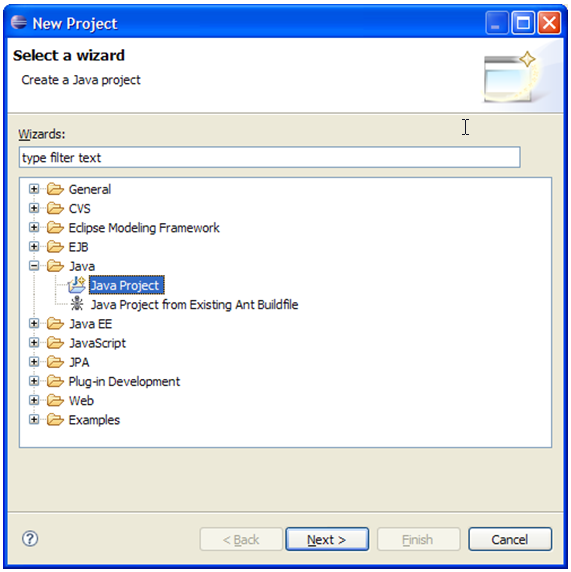
Enter a name for the project (e.g. HelloWorldElement) and select the option to create the project from an existing source. Select the root for the element plugin (for example, C:\GX\plugin\helloworldelement).
Click [Finish]. The project will now be created:

Eclipse might prompt you to switch to the Java perspective. The perspective, that is the way windows in eclipse are ordered, can be modified later via the Window > Open perspective menu or in the right upper corner of the Eclipse user interface: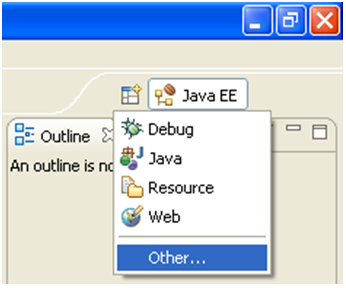
After the project has been created, Eclipse will look like the following: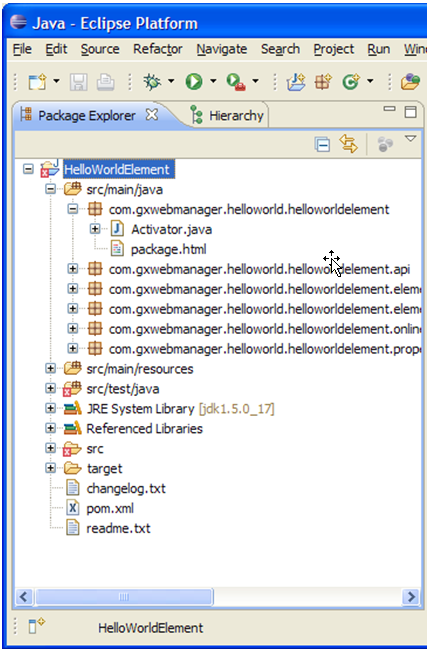
Configuring One-click Building and Deploying of the Plugin
Plugins can be built by executing the command mvn –s settings.xml clean package — The resulting JAR file has to be then copied to the work/deploy folder in the XperienCentral installation in order to deploy the plugin. This technique involves manual actions that must be performed in different environments. It is also possible to configure Eclipse so that the plugiun is built and deployed with one click of a button. To implement this, you must perform the following steps:
- Create a call to an external tool that triggers the build process of the plugin.
- Extend the
pom.xmlof the project with a copy action.
Configure a New External Tool
To automate the build process in Eclipse, perform the following steps:
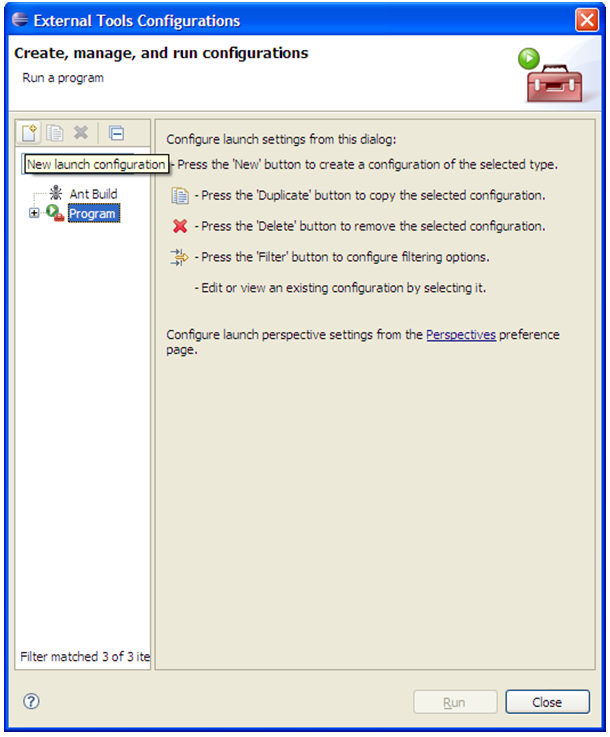
- Navigate to the External Tools configuration (Run > External Tools > External Tools Configurations):
- In the left pane, select "Program" and click [New]:
Configure the external tool. Set at least the following properties:
Property Description Name Define a name for running this command.
Location Select the
mvn.batfile [Browse File System…].Working Directory Select your project by clicking [Browse Workspace…].
Arguments Fill this field with the following
-s <path to the settings.xml> clean package.If other plugins have dependencies to this plugin you might consider using
-s <path to the settings.xml> clean installinstead to also install the plugin in the Maven Repository.Click [Apply].
Click [Run] to execute the command.
Add the Copy Action to pom.xml
The following steps explain how to add a copy action to the pom.xml. This copy action will copy the JAR file (that is a result of the build process) to the XperienCentral work folder.
- Open the project and edit the
pom.xmlfile Add the following plugin inside the ‘build’ tag to the
pom.xml:<plugin> <artifactId>maven-antrun-plugin</artifactId> <version>1.1</version> <executions> <execution> <phase>package</phase> <goals> <goal>run</goal> </goals> <configuration> <tasks> <copy file="${project.build.directory}\${project.build.finalName}.jar" todir="${webmanager.wcbdeploydir}" overwrite="true" /> </tasks> </configuration> </execution> </executions> </plugin>
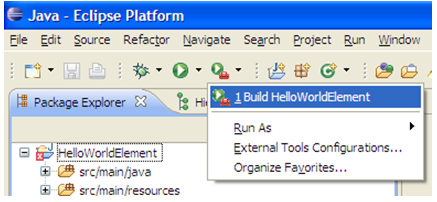
Using the One-click Build and Deploy
Now you can build your plugin and deploy it to XperienCentral by clicking the play icon (green with a red suitcase):